
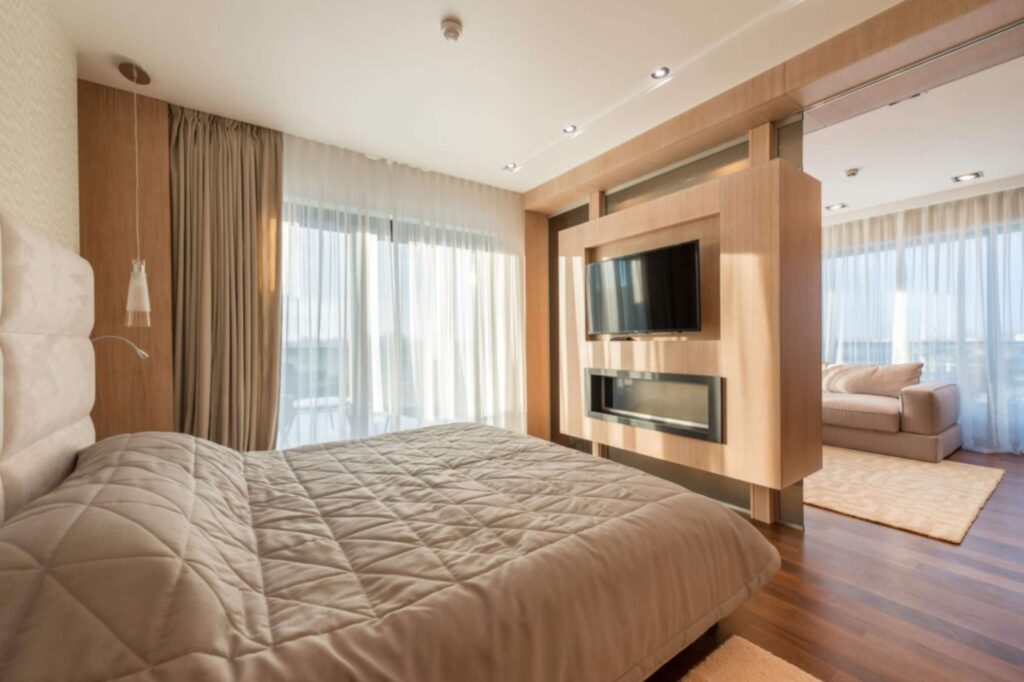
Studio Apartment Bedroom Ideas: Creating a Comfortable Sleeping & Rest Area
- What Makes a Good Bedroom Area in a Studio Apartment?
- Step 1: Study Your Studio Before Choosing the Bedroom Location
- Step 2: Choose the Best Sleeping Zone
- Step 3: Protect the Main Walking Path
- Step 4: Decide How Much Privacy You Actually Need
- Step 5: Choose The Right Way To Separate The Sleeping Area
- Step 6: Choose The Right Bed For Your Studio Apartment
- Step 7: Give The Sleeping Zone Its Own Visual Identity
- Step 8: Create Bedroom Lighting That Feels Different
- Step 9: Protect Natural Light
- Step 10: Think About Airflow And The Sleep Environment
- Step 11: Reduce Noise Around The Sleeping Area
- Step 12: Build Storage Around The Bedroom Without Making It Feel Like A Storage Room
- Step 13: Create A Small Rest Area Beyond The Bed
- Step 14: Keep Work Away From The Sleeping Zone When Possible
- Step 15: Choose The Right Bedroom Solution For Your Type Of Studio
- Step 16: Make The Bedroom Feel Bigger Without Adding Space
-
Step 17: Avoid These Common Studio Bedroom Mistakes
- Mistake 1: Buying The Bed First
- Mistake 2: Choosing A Divider Only Because It Looks Good
- Mistake 3: Blocking The Main Window
- Mistake 4: Ignoring Airflow
- Mistake 5: Turning The Sleeping Zone Into A Storage Wall
- Mistake 6: Forgetting Nighttime Movement
- Mistake 7: Putting Work Everywhere
- Mistake 8: Making The Studio Too Divided
- Mistake 9: Using Tall Furniture Without Considering Safety
-
Studio Apartment Bedroom Ideas: A Simple Decision Guide
- Question 1: What Is My Biggest Bedroom Problem?
- Question 2: Do I Need Physical Separation Or Visual Separation?
- Question 3: Do I Need More Storage?
- Question 4: Where Does My Natural Light Come From?
- Question 5: How Does Air Move Through The Studio?
- Question 6: What Happens At Night?
- Question 7: Am I Renting?
- Question 8: Does My Bed Need To Do More Than Provide Sleeping Space?
- A Simple Studio Bedroom Decision Matrix
- A Before You Buy Studio Bedroom Planning Checklist
-
Frequently Asked Questions About Studio Apartment Bedroom Ideas
- How Do I Create A Bedroom In A Studio Apartment?
- How Can I Separate My Bedroom In A Studio Apartment Without Building A Wall?
- What Is The Best Way To Divide A Studio Apartment Bedroom?
- Can A Studio Apartment Have A Bedroom Area Without A Separate Room?
- Where Should I Put My Bed In A Studio Apartment?
- How Do I Make A Studio Bedroom Feel Private?
- How Do I Keep Natural Light When Separating My Studio Bedroom?
- Can A Wardrobe Divide A Studio Bedroom?
- Is A Murphy Bed Good For A Studio Apartment?
- How Can I Make A Studio Bedroom Feel Bigger?
- How Can I Make My Studio Apartment Bedroom Quieter?
- Should My Desk Be Beside My Bed In A Studio Apartment?
- How Much Privacy Does A Studio Bedroom Really Need?
- A Practical Studio Bedroom Example
- What If Your First Layout Does Not Work?
- A Studio Apartment Bedroom Should Support Your Real Life
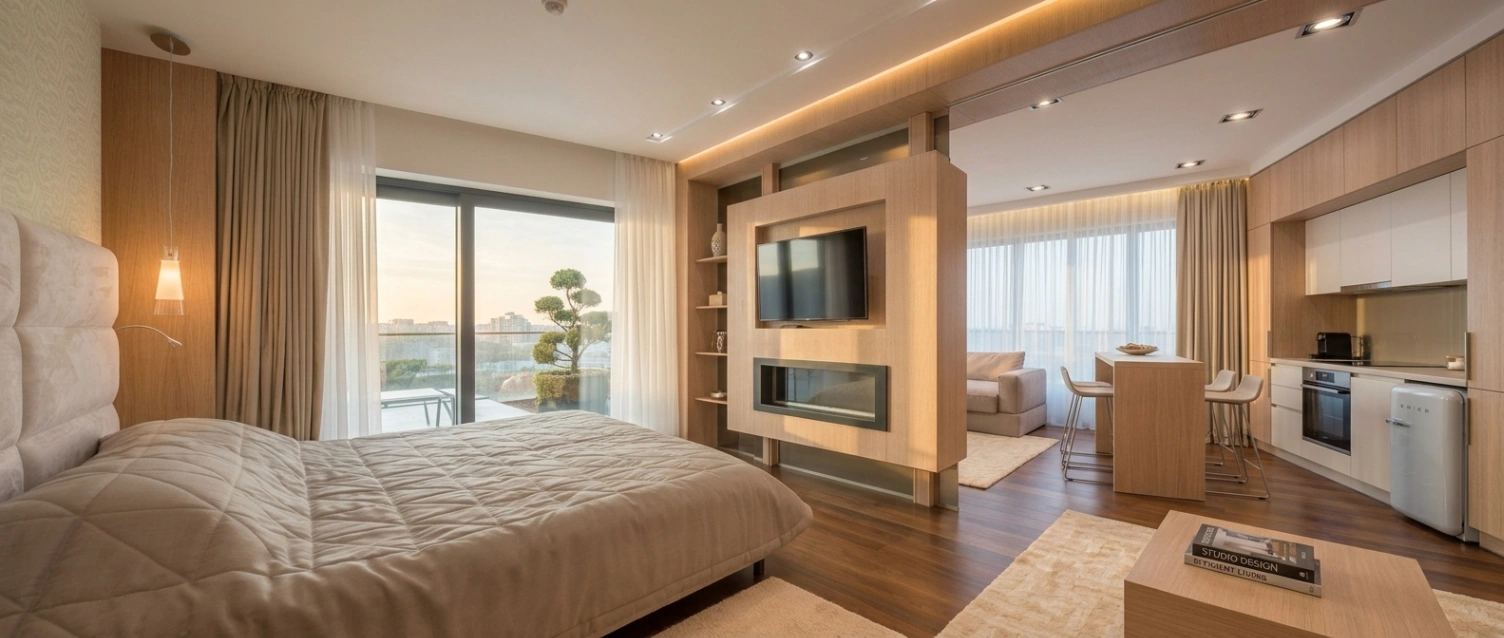
Living in a studio apartment means that one open space often has to do many jobs.
The same room may be your bedroom, living room, workspace, dining area, storage area, and sometimes even your entertainment space.
That makes the sleeping area especially important.
You may have enough room for a bed, but that does not automatically mean you have a comfortable bedroom area. The bed might be visible from the entrance, too close to the kitchen, exposed to noise, blocking a walking path, or positioned where a divider cuts off valuable natural light.
This is why studio apartment bedroom ideas should not begin with furniture shopping.
They should begin with understanding your space.
In this guide, we will look at how to choose a sleeping zone, protect circulation, create privacy, select a suitable bed, manage light and airflow, add storage, reduce visual clutter, and create a small rest area that works with the rest of the studio.
The goal is not to make a studio apartment pretend to be a large apartment.
The goal is to make the space work better for the way you actually live.
What you will learn: By the end of this guide, you should be able to look at your own studio apartment, identify the main challenges around your sleeping area, compare different solutions, understand their trade-offs, and choose an arrangement that fits your space.
What Makes a Good Bedroom Area in a Studio Apartment?
A bedroom area in a studio apartment does not necessarily need four walls.
What it needs is a clear purpose.
You need enough room to get into bed, move around it where necessary, store the things you regularly use, and maintain a comfortable environment for sleeping.
At the same time, the sleeping area should work with the rest of the apartment.
For example, placing the bed in the largest empty section of the studio might seem like the easiest solution. But if that position blocks the route from the entrance to the bathroom, interferes with the kitchen, or forces you to move awkwardly around the furniture, the layout may not work well in everyday life.
This is why it helps to think in terms of zones rather than rooms.
A studio apartment may have a:
Sleeping zone
Living zone
Kitchen zone
Work zone
Dining zone
Storage zone
Main circulation path
These zones do not always need physical walls between them.
They simply need to work together.
Quick Lesson
A successful studio bedroom is not simply a bed placed somewhere in the apartment.
It is a sleeping zone that supports good rest while still allowing the rest of the studio to function properly.
The same zoning approach can also help you create a comfortable and functional living area. See our guide to Living Space Inspirations in a Studio Apartment for practical ideas on making the living zone work alongside the rest of your space.
Step 1: Study Your Studio Before Choosing the Bedroom Location
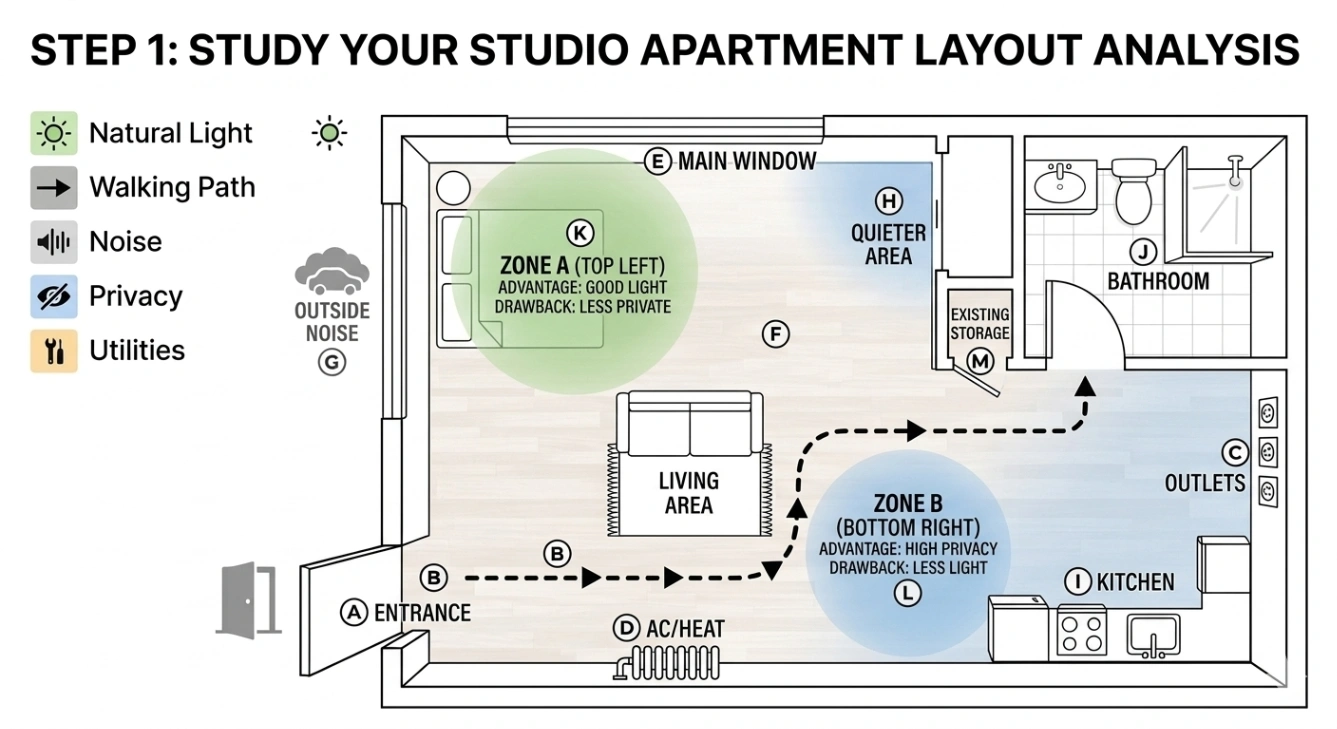
Before choosing where your bed should go, study the entire studio.
Start from the entrance and look at how the space is connected.
Ask yourself:
Where is the natural walking path?
Where is the main window?
Where is the kitchen?
Where is the bathroom entrance?
Where are the electrical outlets?
Where does the strongest natural light enter?
Where are the AC or ventilation points?
Where does outside noise come from?
Where is the existing storage?
Which area is quieter?
Where would the bed interfere with movement?
You are not trying to find the perfect bedroom location immediately.
You are trying to understand the apartment before making a decision.
Simple Studio Planning Exercise
Take a simple sketch of your studio apartment and mark:
Entrance
Windows
Kitchen
Bathroom
Existing storage
Main circulation route
Possible sleeping zones
You do not need a professional floor plan.
A simple drawing is enough.
The goal is to see how the different parts of your studio connect before you decide where the sleeping area should go.
Think About It
Imagine two possible sleeping locations.
One may give you more privacy, but block the main walking path.
The other may keep circulation open, but leave the bed visible from the entrance.
Which problem matters more in your daily life?
There may not be one universally correct answer.
The better choice depends on how you actually use your studio.
Step 2: Choose the Best Sleeping Zone
Once you understand the space, compare your possible sleeping locations.
A useful sleeping zone should consider more than available floor area.
Think about five things:
Privacy
Natural light
Circulation
Noise
Airflow
You do not necessarily need to maximize all five.
Instead, identify which problems matter most in your particular studio.
If Privacy Is Your Main Problem
Look for a position where the bed is not directly visible from the entrance or main living area.
A divider, wardrobe, shelving unit or curtain may then help create a stronger boundary.
If Natural Light Is Limited
Be careful about placing a tall solid partition between the bed and your main window.
A curtain, open shelving, slatted screen or lower divider may allow more light to pass through.
If Noise Is the Main Problem
Think about where the noise comes from.
If the kitchen is active late at night, you may prefer more separation between the kitchen and sleeping area.
If street noise enters through a window, simply moving the bed may not solve the problem. Window coverings, soft furnishings and other measures may be more relevant.
If Circulation Is the Main Problem
Prioritize a clear route through the apartment.
A beautiful bedroom arrangement becomes much less useful if every trip to the bathroom requires squeezing past the bed.
Simple Rule
Choose the sleeping zone by studying the whole studio, not by choosing the biggest empty space.
Step 3: Protect the Main Walking Path
One of the easiest mistakes in a studio is treating circulation as leftover space.
It is not.
People need to move between the entrance, bathroom, kitchen, living area, storage and sleeping area.
If furniture is placed across those natural routes, the studio can feel smaller than it actually is.
Before finalizing your bed position, physically walk through the apartment.
Pretend you are:
- Entering with groceries
- Going to the bathroom at night
- Making breakfast
- Carrying laundry
- Moving from the bed to the entrance
- Cleaning the floor
- Opening storage
- Sitting down in the living area
If the layout repeatedly forces you around furniture, reconsider it.
Practical Test
Do not judge the layout only while standing still.
Walk it.
A floor plan can look excellent on paper while feeling uncomfortable in daily life.
If your bathroom is also tight on space, see our guide to Small Bathroom Layout Ideas for Studio Apartments for practical ways to improve bathroom movement and functionality.
Step 4: Decide How Much Privacy You Actually Need
Not everyone needs the same level of bedroom separation.
There is a difference between:
- visual separation
- privacy
- acoustic separation
- physical separation
A curtain may give you visual privacy.
A bookcase may create a visual boundary while keeping the studio open.
A wardrobe can create stronger separation.
A solid wall can provide much more physical separation, but it may also reduce light and openness.
This distinction matters.
Ask Yourself:
Do I simply want the bed to feel like its own zone?
Or do I want to hide the bed completely?
Do I need privacy when guests visit?
Do I need to reduce noise?
Do I rent the apartment?
Do I need to reverse the arrangement later?
Your answer changes the solution.
Think About It
A divider should solve a specific problem.
Do not install a large partition simply because studio-bedroom photographs often show them.
Step 5: Choose The Right Way To Separate The Sleeping Area
There are several ways to create a bedroom-like zone without constructing a permanent wall.
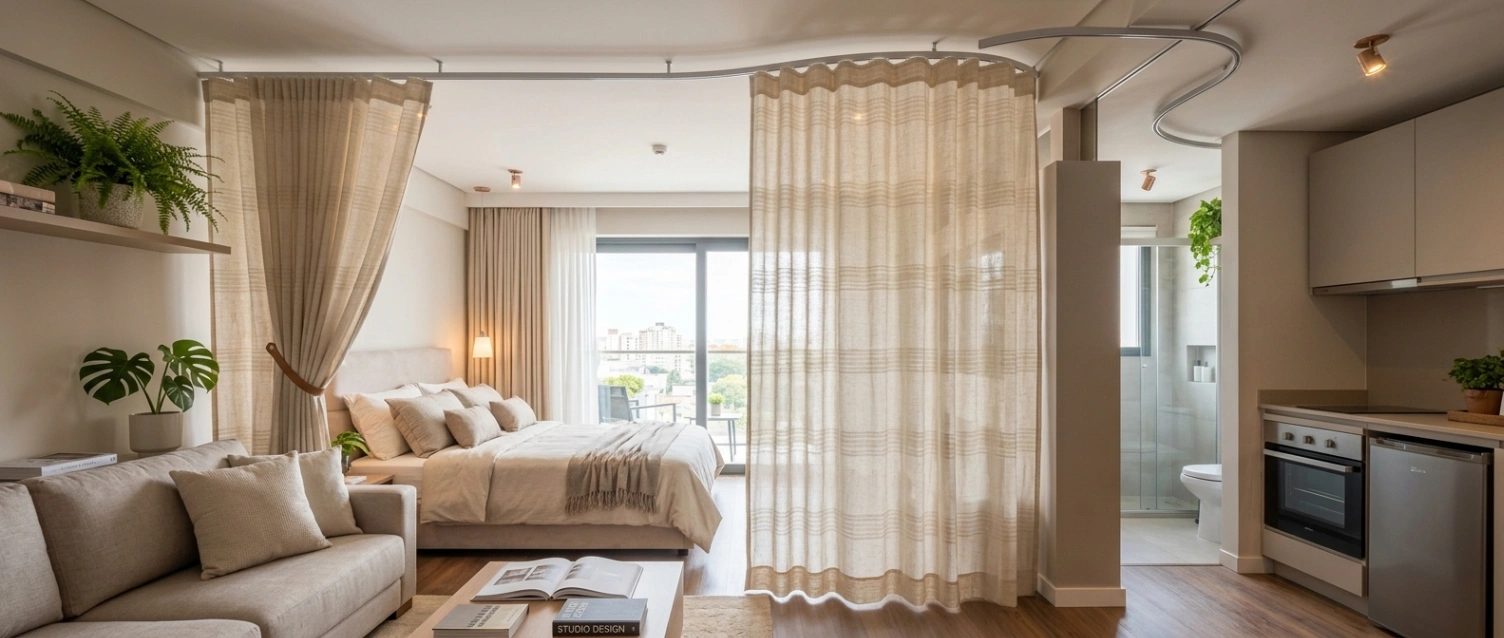
Option 1: Curtains
Curtains are one of the simplest ways to visually separate a sleeping area.
They can be opened during the day and closed when you want privacy.
Useful When:
- You Rent
- You Want Flexibility
- You Want To Preserve Openness
- You Do Not Want A Permanent Partition
Trade-Off:
Curtains provide visual separation, but they do not create the same physical or acoustic separation as a solid wall.
They can also make the sleeping area darker when closed.
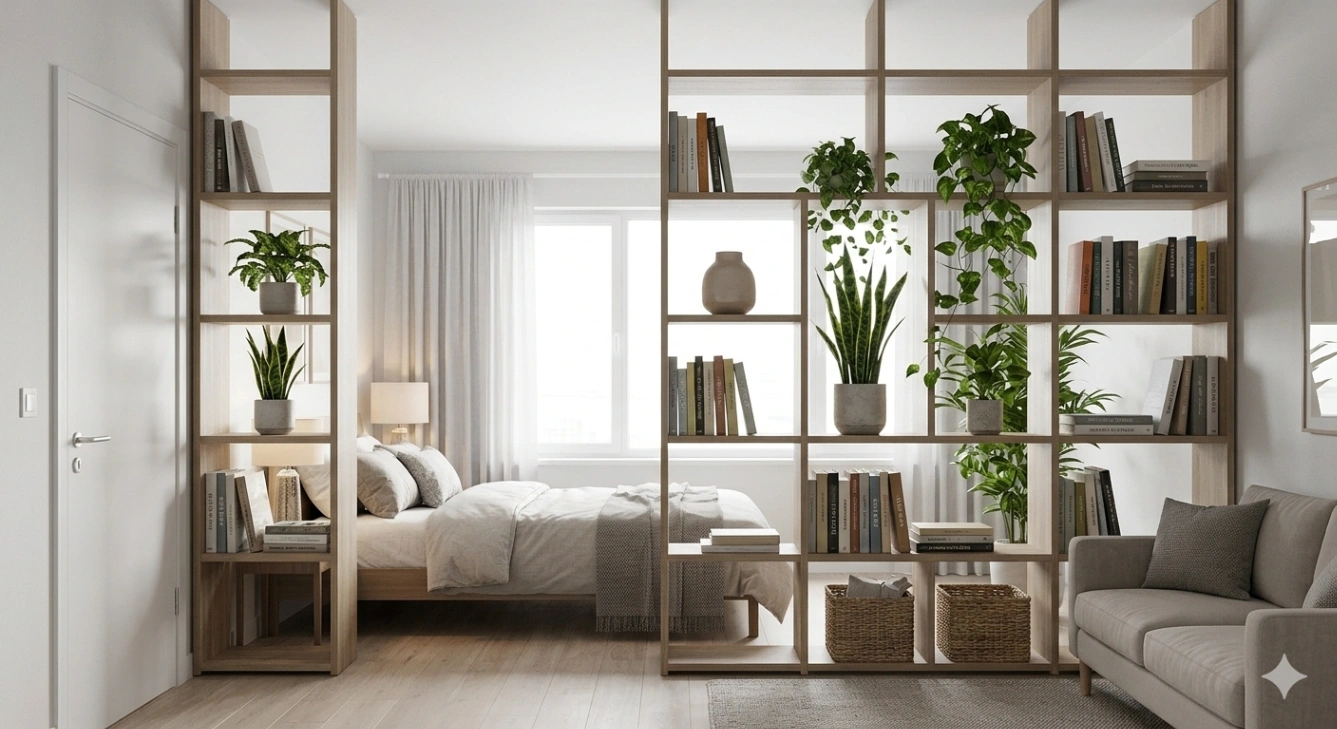
Option 2: Open Shelving
An open shelving unit can separate the bed from the living area while allowing some light and visibility to pass through.
It can also provide storage.
This makes it useful when you want one piece of furniture to perform two jobs.
Useful When:
- You Need Storage
- You Want Visual Separation
- You Want To Preserve Some Openness
Trade-Off:
Open shelves do not completely hide the sleeping area, and they can become visually cluttered if overloaded.
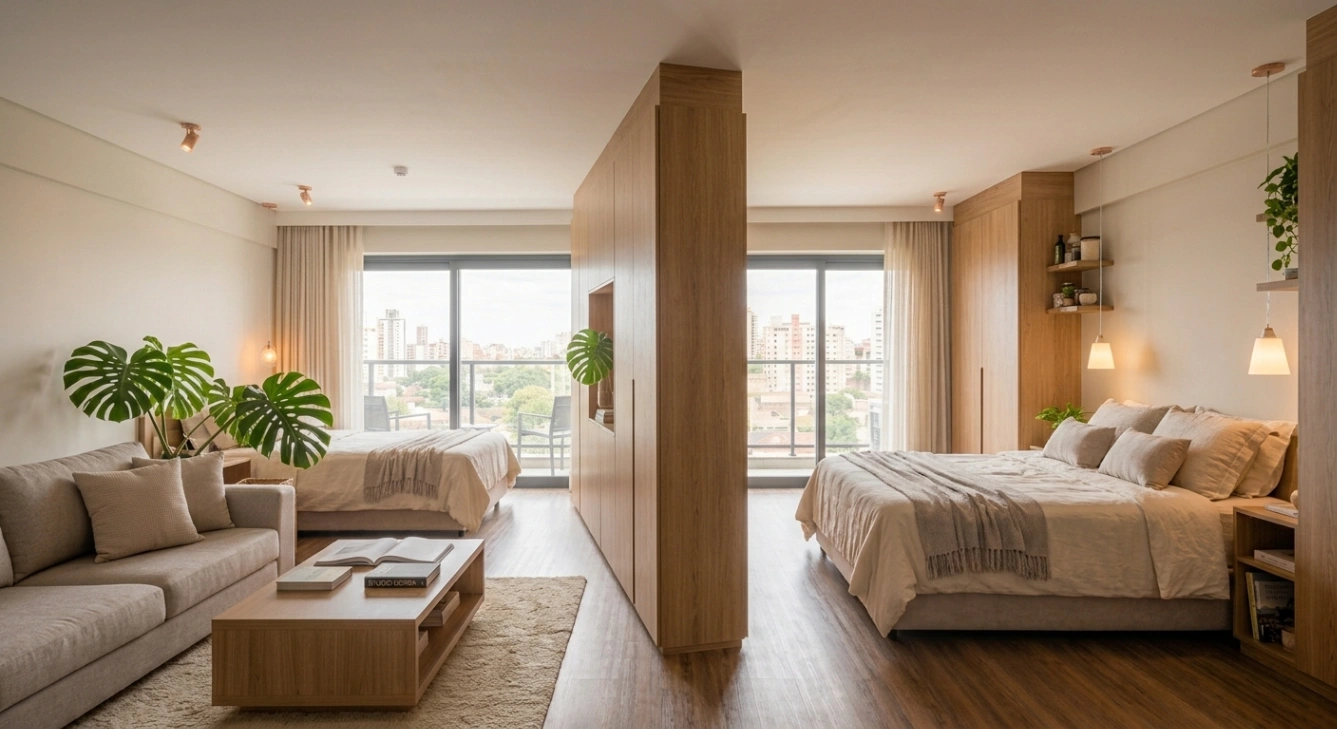
Option 3: Wardrobe as a Divider
A wardrobe can create a stronger boundary while providing essential clothing storage.
This can be particularly useful when the studio does not have enough built-in storage.
Useful When:
- You Need A Wardrobe Anyway
- You Want Stronger Visual Separation
- The Furniture Can Be Positioned Safely
Trade-Off:
A tall wardrobe can make the studio feel more enclosed and may block light.
If you use tall or top-heavy furniture, follow the manufacturer’s safety instructions and use appropriate anti-tip protection where required. The U.S. Consumer Product Safety Commission (CPSC) recommends securing top-heavy furniture with appropriate anti-tip devices and following manufacturer instructions.
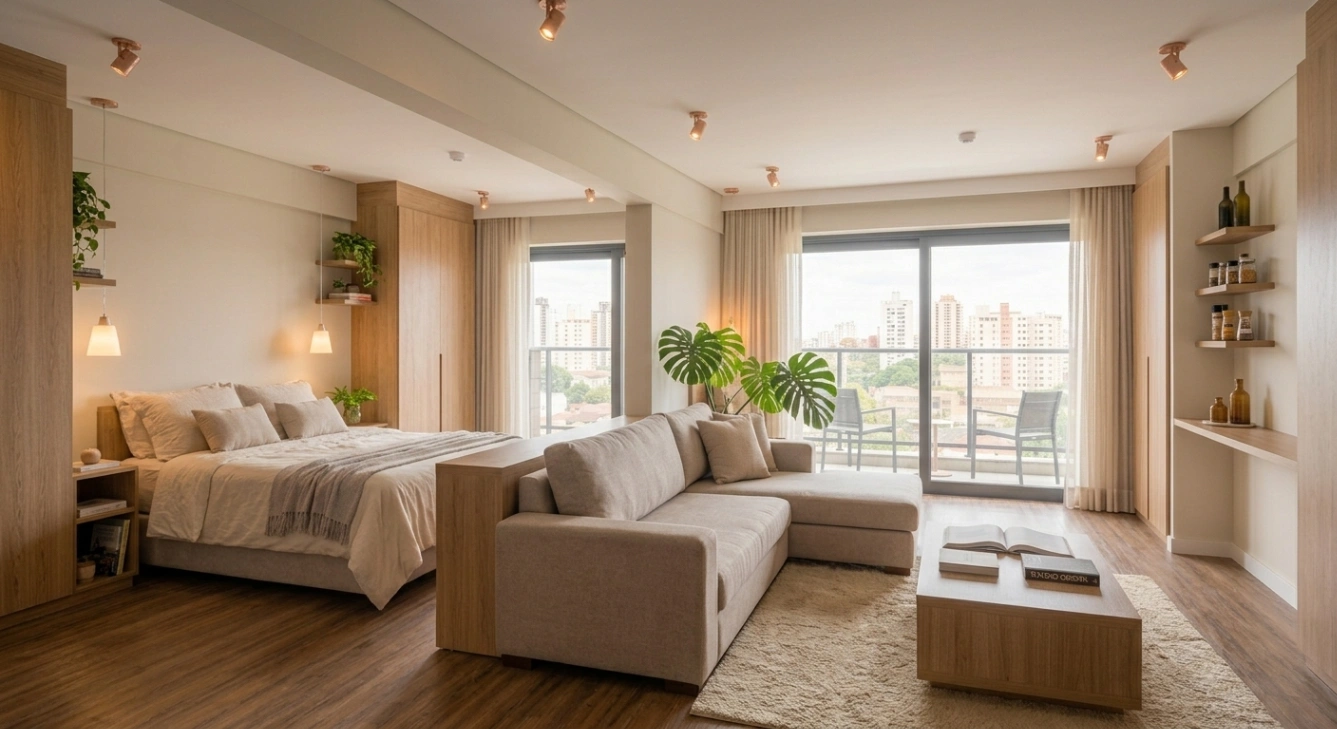
Option 4: The Back Of A Sofa
Sometimes you already own the divider.
The back of a sofa can help distinguish the living zone from the sleeping zone.
This approach can work particularly well when the sofa faces away from the bed.
Useful When:
- You Already Have A Sofa
- You Want A Low-Cost Zoning Solution
- You Want The Studio To Remain Open
Trade-Off:
A sofa usually provides less privacy than a curtain, shelf or wardrobe.
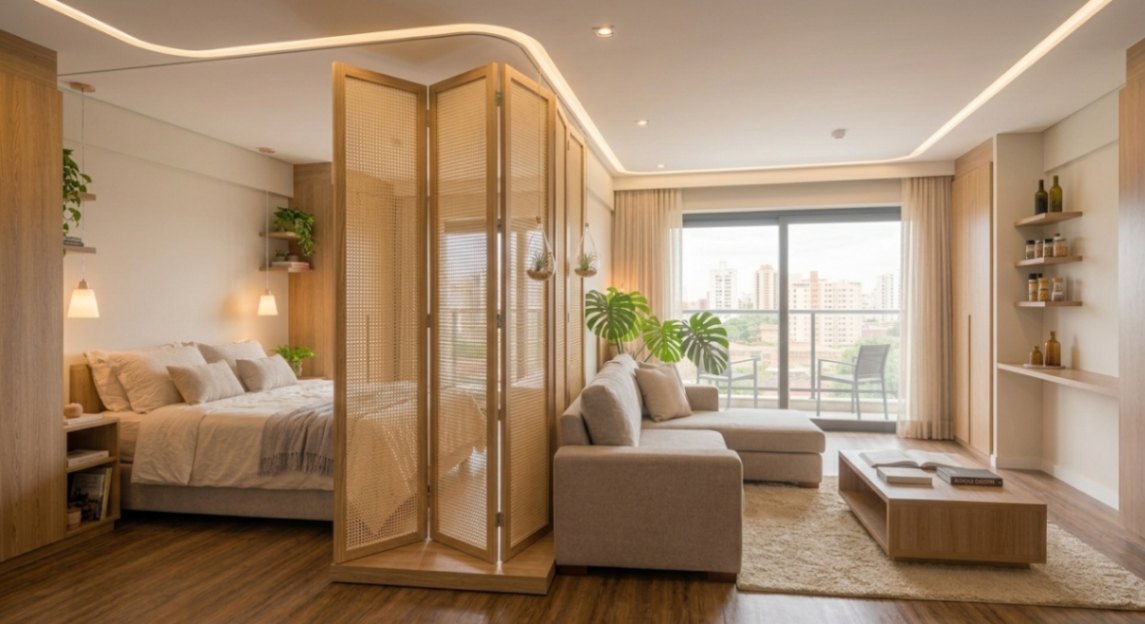
Option 5: Folding Screen
A folding screen can provide temporary separation.
It can be moved or stored when you want the room to feel more open.
Useful When:
- You Need Occasional Privacy
- You Rent
- You Want A Movable Solution
Trade-Off:
It takes floor space and may be less stable than fixed furniture. Check the manufacturer’s instructions and make sure the screen is positioned safely.
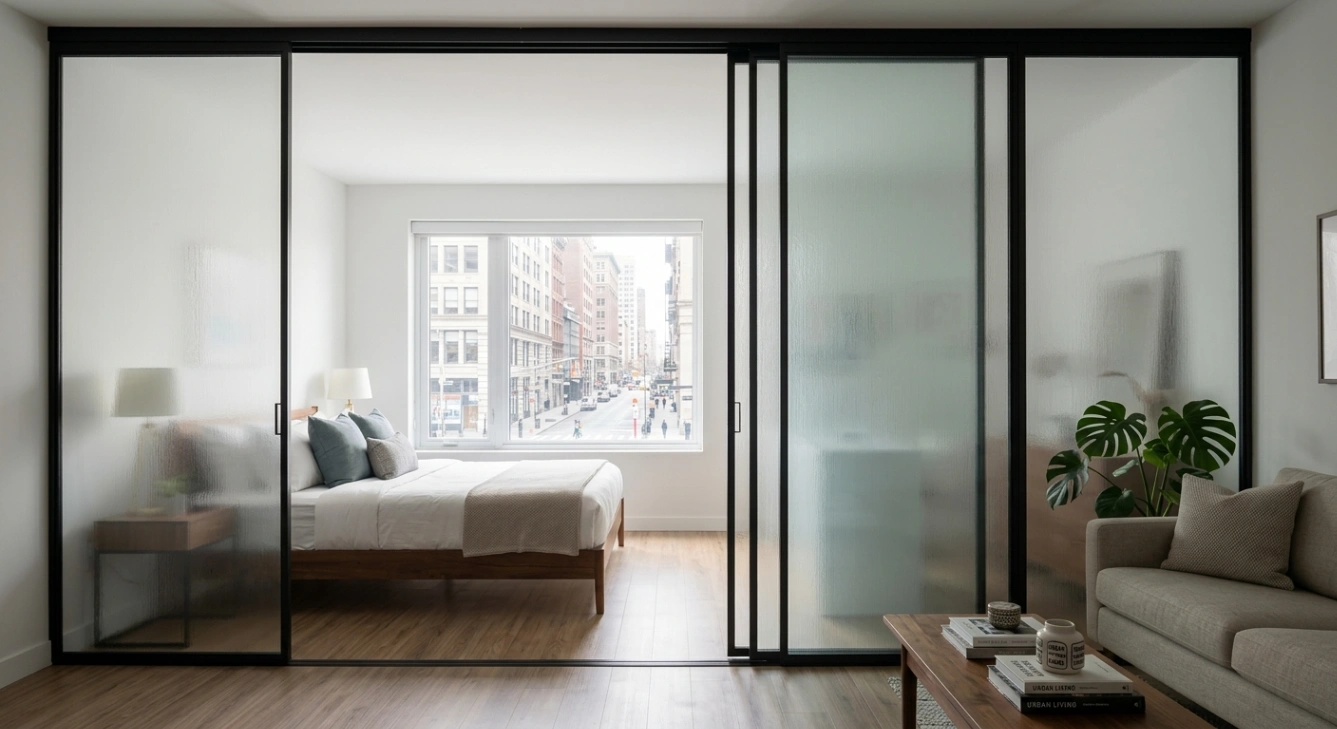
Option 6: Sliding Or Folding Partition
A sliding or folding partition can provide stronger separation without permanently closing the entire studio.
Useful When:
- Privacy Is Important
- The Apartment Allows Installation
- You Want The Option To Open The Bedroom Area
Trade-Off:
Installation, cost and permission may be greater concerns, especially for renters.
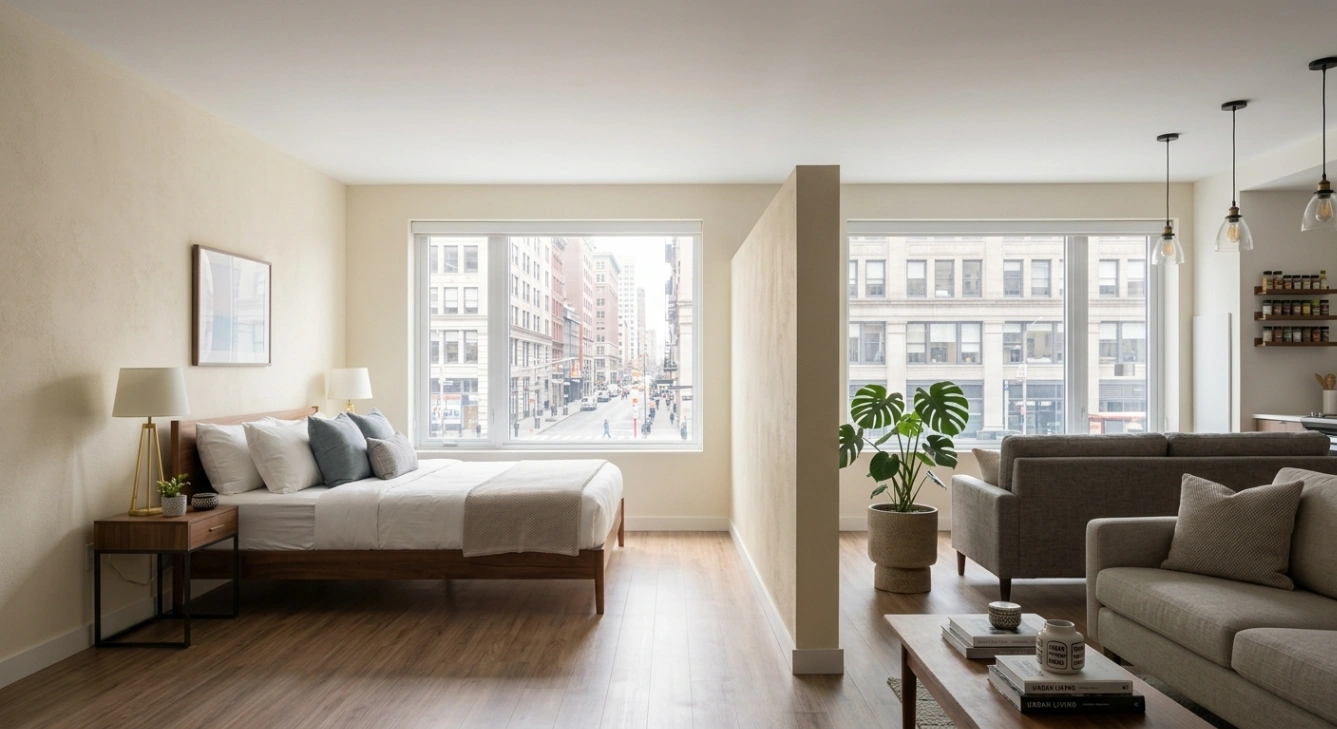
Option 7: Partial Architectural Partition
A partial wall or built-in partition can create a strong bedroom zone.
It can also be designed to include shelves, niches or other functions.
Useful When:
- You Own The Property Or Have Permission
- Long-Term Separation Is Important
- The Layout Can Support It
Trade-Off:
It is less flexible and may reduce natural light or openness.
Simple Divider Decision Guide
Want The Easiest Reversible Option?
Consider curtains.
Need Separation Plus Storage?
Consider open shelving or a wardrobe.
Already Have A Sofa Positioned Well?
Use its back as a visual boundary.
Need Occasional Separation?
Consider a folding screen.
Need Stronger Long-Term Separation?
Consider a sliding, folding or partial partition where appropriate.
Need Complete Separation?
A permanent wall may be possible, but this requires more planning and may not be suitable for a rental.
Step 6: Choose The Right Bed For Your Studio Apartment
The bed is usually the largest single piece of furniture in the sleeping area.
That means your bed decision affects the entire layout.
Do not ask only:
“Which bed looks good?”
Also ask:
“What job does this bed need to perform in my studio?”
Standard Bed
A standard bed may be the simplest choice when floor space allows it.
Its main advantage is straightforward use.
Consider It When:
Comfort and simplicity are more important than saving every possible square foot.
Storage Bed
A storage bed can combine sleeping and storage.
This can reduce the need for additional furniture.
Useful When:
- Wardrobe Or Storage Is Limited
- You Need Space For Bedding
- You Want To Reduce Visible Clutter
Trade-Off:
Storage mechanisms can add weight, cost and complexity.
Murphy Bed
A Murphy bed can fold away when the sleeping area needs to become another type of space.
This can be useful in a studio that needs to serve several purposes.
Useful When:
- You Need The Floor During The Day
- Your Studio Doubles As A Work Or Living Space
- You Are Comfortable With The Installation Requirements
Trade-Off:
It may cost more and requires careful planning around wall structure, operation and clearance.
Daybed
A daybed can visually connect the sleeping area with the living area.
It may work especially well when the studio is used as a lounge during the day.
Trade-Off:
It may not provide the same bedroom feeling as a dedicated bed setup.
Loft Bed
A loft bed uses vertical space rather than only floor space.
The area underneath can potentially become a desk, storage area or seating zone.
Trade-Off:
Access, ceiling height, safety and comfort need to be considered carefully.
Simple Rule
Choose the bed after understanding your space, not before.
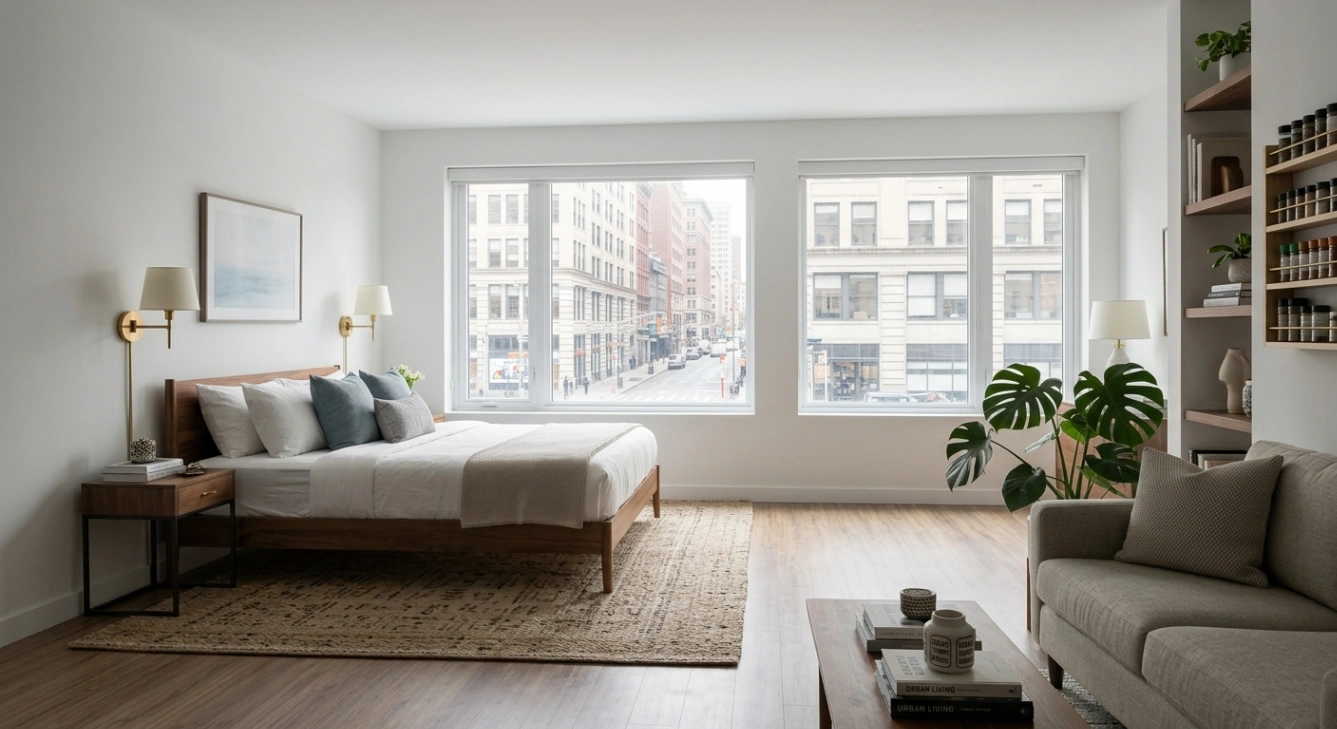
Step 7: Give The Sleeping Zone Its Own Visual Identity
Your sleeping area does not need a wall to feel different.
You can create visual identity through:
- bedding
- a rug
- lighting
- wall color
- artwork
- a headboard
- curtains
- furniture placement
- texture
The goal is not to create a completely different room.
It is to help your brain recognize:
This is the sleeping zone.
A rug under or around the bed can visually define the area.
A bedside light can establish a separate nighttime atmosphere.
A consistent color or material can connect the bed area without making it look disconnected from the rest of the studio.
Quick Lesson
You Can Create A Boundary Visually Without Creating A Physical Barrier.
Step 8: Create Bedroom Lighting That Feels Different
Lighting can help establish the sleeping zone as a separate part of the studio.
Instead of relying on one bright ceiling light for the entire apartment, consider layers.
For example:
- general room lighting
- bedside lighting
- task lighting
- soft ambient lighting
A bedside lamp can make the sleeping area feel more intentional.
Wall-mounted or compact lights can also reduce the need for floor or bedside furniture.
Think about what happens at night.
If the entire studio remains brightly lit while you are trying to relax in bed, the sleeping zone may not feel very restful.
The lighting should support the different functions of the studio.
Think About It
Your studio has multiple zones, so why should every zone have exactly the same lighting?
Step 9: Protect Natural Light
Natural light is one of the most valuable resources in a small apartment.
A solid divider placed between the sleeping area and the main window can change how daylight reaches the rest of the studio.
Before installing a partition, ask:
- Will it block the window?
- Will it make the living area darker?
- Will the sleeping zone become too dark during the day?
- Can light pass around or through the divider?
- Can I open the divider when I want more openness?
This is where semi-open solutions can become useful.
Curtains, open shelving, slatted screens and carefully positioned furniture can provide some separation without creating a complete visual barrier.
Simple Rule
Before adding a divider, follow the daylight.
Step 10: Think About Airflow And The Sleep Environment
A bedroom zone should not only look comfortable.
It should also support a comfortable sleep environment.
The CDC’s National Institute for Occupational Safety and Health recommends a sleep environment that is dark, quiet, cool and comfortable.
That matters in a studio because the sleeping area is often close to other activities.
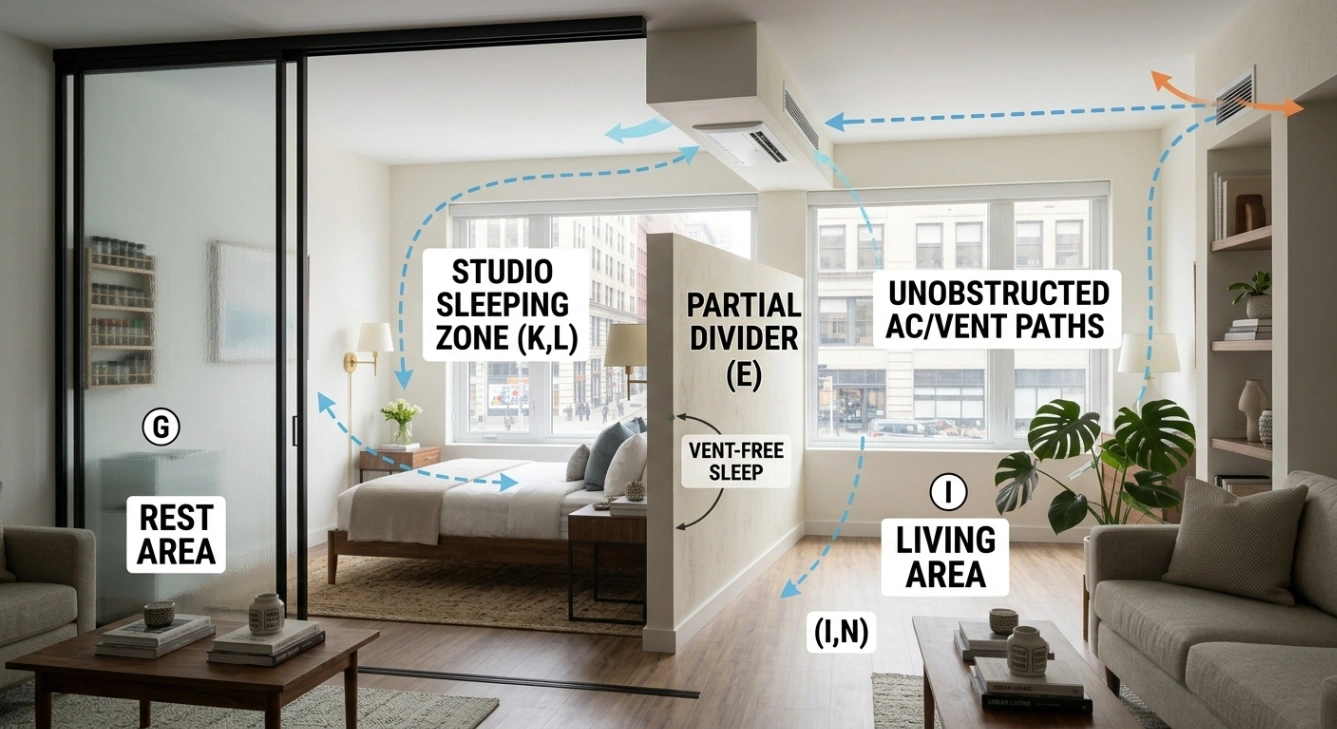
A partition can change how air moves around the space.
Before placing a tall divider, consider:
- Where does conditioned air enter?
- Where does air return or circulate?
- Will the divider block a vent?
- Will the sleeping area become warmer?
- Does the partition create a cramped pocket of air?
The EPA also notes that inadequate ventilation can increase indoor pollutant levels, while temperature and humidity can affect indoor air quality.
This does not mean every studio needs a complicated ventilation system.
It means do not treat airflow as an afterthought.
Simple Rule
A divider should separate spaces without unnecessarily trapping the sleeping area.
Step 11: Reduce Noise Around The Sleeping Area
Noise can be one of the hardest problems to solve in a studio because there are few walls separating activities.
Potential sources include:
- cooking
- television
- conversations
- traffic
- neighbors
- appliances
- building systems
- phones and notifications
You may not be able to eliminate the source.
Instead, think about reducing the impact.
For example:
- position the bed away from obvious noise sources where practical
- Use curtains or soft furnishings where they make sense
- Avoid unnecessary hard surfaces around the sleeping area
- Use appropriate window coverings where outside light or noise is a problem
- Keep phones and notifications from disturbing sleep
The Centers for Disease Control and Prevention (CDC), through its National Institute for Occupational Safety and Health (NIOSH), recommends a sleep environment that is dark, quiet, cool and comfortable.
Important Distinction
A curtain can provide privacy.
It should not be presented as a substitute for proper acoustic construction.
If you have serious noise problems, the source of the noise and the building itself may require a different solution.
Step 12: Build Storage Around The Bedroom Without Making It Feel Like A Storage Room
Storage is one of the biggest challenges in compact homes.
But adding storage everywhere can make the bedroom area feel crowded.
Instead, look for storage that performs more than one function.
Examples include:
- storage beds
- under-bed containers
- bedside shelves
- wall-mounted shelves
- wardrobes
- open shelving
- storage benches
- vertical cabinets
Think about the items you use most often.
Daily items should be easy to reach.
Seasonal or rarely used items can be placed farther away.
Storage Zoning Exercise
Create three categories:
Daily
Things you use every day.
Weekly
Things you use regularly but not constantly.
Occasional
Things you need only from time to time.
Keep daily items closest to the sleeping zone.
This simple organization can reduce unnecessary movement and visual clutter.
If you are looking for space-saving products that can support a compact bedroom setup, you can explore our Product Index for selected options for studio apartments.
Step 13: Create A Small Rest Area Beyond The Bed
A bedroom is not always only about sleeping.
Some people want a place to:
- read
- drink coffee
- relax
- listen to music
- think
- use their phone
- sit quietly
You do not necessarily need a separate lounge room.
A small chair, stool, floor cushion or compact bench may be enough.
The important thing is not the size.
It is the purpose.
A small rest corner can make the studio feel like a home rather than a room dominated by one bed.
Think About It
If your studio is where you sleep, work, eat and relax, what small area can you create that tells your mind:
Now I am relaxing.
Step 14: Keep Work Away From The Sleeping Zone When Possible
Many studio residents work from home.
This creates another challenge.
The bed may be only a few steps away from the desk.
If possible, create a visual distinction between work and sleep.
You could:
- place the desk in a different zone
- position the desk near natural light
- use a shelf as a visual boundary
- close a curtain after work
- use different lighting for work and rest
- keep work equipment organized when the workday ends
The goal is not to create a perfect office.
It is to prevent every part of the studio from feeling like one continuous activity area.
CDC/NIOSH sleep-environment guidance also recommends keeping work and other stimulating activities out of the sleep space where possible.
Step 15: Choose The Right Bedroom Solution For Your Type Of Studio
There is no single studio-bedroom layout that works for everyone.
Your apartment’s shape changes the decision.
Long And Narrow Studio
A long studio often benefits from arranging zones along the length of the apartment.
You may place the sleeping zone toward one end and living or kitchen functions toward the other.
A curtain or partial divider can help define the sleeping area without creating a narrow enclosed room.
Watch out for: blocking the main walking route.
Square Studio
A square room may give you more freedom to experiment with furniture placement.
You can sometimes create zones around a central circulation area.
Watch out for: placing furniture in a way that makes the room feel divided into too many small pieces.
Studio With One Main Window
When one window provides most of the daylight, protecting its light becomes especially important.
Avoid automatically placing a tall solid divider directly between the window and the rest of the apartment.
Possible approach: use a semi-open divider or position the sleeping area so the main living space can still benefit from daylight.
Studio With Kitchen Near The Entrance
This arrangement can naturally place the sleeping zone farther from the entrance.
You may be able to create a visual sequence:
Entrance → Kitchen → Living → Sleeping
or another arrangement that fits the actual apartment.
Watch out for: cooking activity, smells, noise and heat reaching the sleeping area.
Studio With A Natural Niche
A niche may already provide some visual separation.
Instead of adding a large divider, use the existing architectural shape.
You might only need:
- a curtain
- lighting
- a rug
- storage
- a headboard
- a different wall treatment
Simple rule: Use the separation your apartment already gives you before adding more.
Renter-Friendly Studio
If you rent, flexibility becomes more important.
Look first at solutions that can be reversed without major construction.
Examples include:
- Curtains
- Freestanding furniture
- Open shelving
- Movable screens
- Removable accessories
- Furniture-based zoning
Always check your rental agreement and building rules before installing anything that affects walls, ceilings or fixed fixtures.
If your studio kitchen is also limited by space, explore our guide to Small Kitchen Layouts for Studio Apartments for practical ideas on organizing a compact cooking area.
Step 16: Make The Bedroom Feel Bigger Without Adding Space
You cannot physically enlarge the apartment through decoration.
But you can reduce the visual weight of the bedroom area.
Consider:
- appropriately scaled furniture
- furniture that performs multiple functions
- keeping pathways clear
- reducing unnecessary pieces
- using vertical storage carefully
- keeping the floor visually open where possible
- using light strategically
- maintaining visual consistency
A common mistake is trying to solve every problem with another piece of furniture.
Sometimes the solution is removing something.
Simple Rule
A smaller number of well-chosen pieces can make a studio bedroom feel more spacious than a room filled with furniture.
In a small studio, every piece of furniture should have a reason to exist.
Step 17: Avoid These Common Studio Bedroom Mistakes
Mistake 1: Buying The Bed First
The bed is important, but buying it before understanding the room can make the rest of the layout difficult.
Better approach: study the studio first.
Mistake 2: Choosing A Divider Only Because It Looks Good
A beautiful divider may block light, interrupt circulation or make the sleeping area too enclosed.
Better approach: identify the problem the divider needs to solve.
Mistake 3: Blocking The Main Window
A large partition can reduce natural light.
Better approach: study how daylight moves through the studio before installing it.
Mistake 4: Ignoring Airflow
A visually attractive sleeping zone may become uncomfortable if ventilation or conditioned airflow is obstructed.
Better approach: keep vents and airflow paths in mind.
Mistake 5: Turning The Sleeping Zone Into A Storage Wall
More storage is useful until the bedroom begins to feel like a warehouse.
Better approach: prioritize the storage you actually need and use multifunctional furniture where appropriate.
Mistake 6: Forgetting Nighttime Movement
The layout may work perfectly during the day but become difficult when you get out of bed at night.
Better approach: test the route between the bed, bathroom and other frequently used areas.
Mistake 7: Putting Work Everywhere
If the laptop, paperwork and work equipment remain around the bed, the sleeping zone may never feel separate from work.
Better approach: create a clear transition between work and rest.
Mistake 8: Making The Studio Too Divided
Trying to create a separate room for every activity can make a small apartment feel even smaller.
Better approach: create zones, not unnecessary walls.
Mistake 9: Using Tall Furniture Without Considering Safety
Tall bookcases, wardrobes and other furniture can create serious tip-over hazards, especially in homes where children may be present.
The U.S. Consumer Product Safety Commission (CPSC)recommends securing top-heavy furniture with appropriate anti-tip devices and following manufacturer instructions.
Studio Apartment Bedroom Ideas: A Simple Decision Guide
If you are unsure where to start, use this sequence.
Question 1: What Is My Biggest Bedroom Problem?
Is it:
- Lack of privacy?
- Lack of storage?
- Noise?
- Poor circulation?
- Poor lighting?
- Lack of space?
- Lack of separation from work?
- An awkward apartment shape?
Start there.
Question 2: Do I Need Physical Separation Or Visual Separation?
If visual separation is enough, you may not need a large partition.
Question 3: Do I Need More Storage?
If yes, consider whether the divider can also provide storage.
Question 4: Where Does My Natural Light Come From?
Protect it before adding a tall or solid divider.
Question 5: How Does Air Move Through The Studio?
Make sure your bedroom solution does not unnecessarily block ventilation or conditioned airflow.
Question 6: What Happens At Night?
Walk the route from your bed to the bathroom and other essential areas.
Question 7: Am I Renting?
If yes, prioritize solutions that can be reversed and check building or rental rules before making changes.
Question 8: Does My Bed Need To Do More Than Provide Sleeping Space?
If you need storage or daytime floor space, multifunctional options may deserve consideration.
A Simple Studio Bedroom Decision Matrix
| Your Main Need | Solutions To Consider | Main Trade-Off |
|---|---|---|
| Basic Visual Separation | Curtain, sofa placement | Limited privacy |
| More Privacy | Curtain, screen, wardrobe, partition | May reduce openness |
| Privacy + Storage | Wardrobe, shelving | Uses more visual/floor space |
| More Daytime Floor Space | Murphy bed | More cost/installation complexity |
| Minimal Furniture | Standard bed + simple zoning | Less hidden storage |
| Renter-Friendly Solution | Curtain, movable screen, furniture zoning | Usually less permanent separation |
| Preserve Daylight | Open shelving, curtain, slatted divider | Less complete privacy |
| Strong Separation | Sliding/partial partition | More installation and space planning |
| Small Rest Corner | Chair, stool, bench | Requires some additional space |
| Work-From-Home Studio | Separate desk zone + visual boundary | Requires careful zoning |
A Before You Buy Studio Bedroom Planning Checklist
Before purchasing a bed, divider, wardrobe or other major item, check the following:
Space
- I know where the sleeping zone should go.
- I have identified the main walking paths.
- I have considered access to the bathroom.
- I have considered access to storage.
- I have checked where doors and windows open.
Light
- I know where natural light enters.
- My proposed divider will not unnecessarily block it.
- I have considered how the sleeping zone looks during the day.
Privacy
- I know how much privacy I actually need.
- I know whether visual separation is enough.
- I understand the difference between privacy and sound separation.
Air And Comfort
- I know where ventilation or air-conditioning points are.
- My furniture will not unnecessarily block them.
- I have considered temperature and airflow around the bed.
Noise
- I know where the main noise comes from.
- I have considered whether bed placement can reduce exposure.
- I am not expecting a simple curtain to provide full soundproofing.
Storage
- I know what storage I actually need.
- I have separated daily-use items from occasional items.
- I am not adding furniture simply because there is an empty wall.
Safety
- Tall furniture is stable.
- I have checked the manufacturer’s safety instructions.
- I will use appropriate anti-tip protection where required.
- Important walking paths remain clear.
Daily Life
- I have walked through the proposed layout.
- I have tested the route at night.
- I have considered cleaning.
- I have considered working from home if applicable.
- I have considered how guests will experience the space.
Frequently Asked Questions About Studio Apartment Bedroom Ideas
How Do I Create A Bedroom In A Studio Apartment?
Start by choosing a suitable sleeping zone rather than immediately installing a divider. Study circulation, natural light, noise, airflow, storage and privacy. Then choose a separation method that fits your needs, such as curtains, shelving, a wardrobe, a screen or a more permanent partition.
How Can I Separate My Bedroom In A Studio Apartment Without Building A Wall?
You can use curtains, open shelving, a wardrobe, the back of a sofa, folding screens or other movable furniture. The right option depends on how much privacy you need and whether you need to preserve natural light and openness.
What Is The Best Way To Divide A Studio Apartment Bedroom?
There is no universal solution. A curtain may work well when flexibility and reversibility matter. Open shelving can combine storage and visual separation. A wardrobe can provide stronger separation and storage. A more permanent partition can provide greater physical separation but requires more planning.
Can A Studio Apartment Have A Bedroom Area Without A Separate Room?
Yes. A studio can have a clearly defined sleeping zone without creating a fully enclosed bedroom. Furniture placement, lighting, rugs, curtains, shelving and other visual boundaries can help distinguish the sleeping area.
Where Should I Put My Bed In A Studio Apartment?
There is no single position that works for every studio. Look for a location that provides enough room for movement, does not unnecessarily interfere with major circulation paths, works with the available natural light, and supports privacy and comfort.
How Do I Make A Studio Bedroom Feel Private?
Start by reducing direct sightlines to the bed. A curtain, screen, wardrobe, shelving unit or furniture arrangement can create a visual boundary. If you need stronger privacy, consider a more substantial partition where the apartment and rental rules allow it.
How Do I Keep Natural Light When Separating My Studio Bedroom?
Consider semi-open solutions such as curtains, open shelving or slatted partitions. Also consider the position of the divider relative to the main window. The goal is to separate the sleeping area without unnecessarily blocking the main source of daylight.
Can A Wardrobe Divide A Studio Bedroom?
Yes. A wardrobe can serve as both storage and a visual boundary. However, consider its size, stability, effect on natural light, circulation and safety before using it as a divider.
Is A Murphy Bed Good For A Studio Apartment?
A Murphy bed can be useful when the same floor area needs to serve different purposes during the day and night. However, it requires careful planning around installation, wall structure, operation and clearance.
How Can I Make A Studio Bedroom Feel Bigger?
Keep circulation clear, avoid unnecessary furniture, choose appropriately scaled pieces, use multifunctional furniture, organize storage and avoid visually overwhelming the sleeping zone.
How Can I Make My Studio Apartment Bedroom Quieter?
First identify the source of the noise. Bed placement, window treatments, soft furnishings and other measures may help reduce disturbance, but they should not be confused with full soundproofing. Serious building-related noise may require a different solution.
Should My Desk Be Beside My Bed In A Studio Apartment?
It can be, especially when space is limited, but creating some visual or functional separation between work and sleep may make the studio easier to use. Even a different lighting setup or a small divider can help distinguish the two activities.
How Much Privacy Does A Studio Bedroom Really Need?
That depends on your lifestyle. Someone living alone may only want the bed to feel visually separate. Someone who frequently has guests may want stronger separation. Couples, remote workers and renters may have different priorities.
A Practical Studio Bedroom Example
Imagine a narrow studio with:
- One main window
- A kitchen near the entrance
- A bathroom beside the entrance
- Limited wardrobe storage
- A bed currently visible from the living area
- · One person working from home
There is no single automatic answer. But the decision process could look like this:
First: protect the walking route from the entrance to the bathroom.
Second: identify whether the sleeping zone can sit farther from the kitchen.
Third: consider the main window before placing a tall divider.
Fourth: because storage is limited, consider whether a wardrobe or open shelving could perform two jobs.
Fifth: because the resident works from home, create a separate work zone rather than placing the desk directly beside the bed if possible.
Sixth: choose a divider based on the required level of privacy.
Seventh: test the arrangement by walking through it during both daytime and nighttime.
Notice what happened.
We did not begin with:
“Buy a curtain.”
We began with the problem.
That is the difference between copying a studio bedroom idea and actually learning how to plan one.
What If Your First Layout Does Not Work?
Do not assume the first arrangement has to be permanent.
Compact living often requires experimentation.
You can test:
- moving the bed
- rotating the bed
- changing the sofa position
- moving a shelf
- opening or closing a curtain
- changing lighting
- reducing furniture
- relocating the desk
- changing where storage is kept
If possible, test a layout before committing to expensive furniture or permanent work.
Simple Rule
Design with your daily routine in mind, then adjust the room as you learn how you actually use it.
A Studio Apartment Bedroom Should Support Your Real Life
A studio apartment bedroom does not have to look like a traditional bedroom to be successful.
It needs to support the person living there.
For one person, that may mean maximum openness.
For another, it may mean strong privacy.
Someone working from home may need separation between sleep and work.
A renter may need a solution that can be removed later.
Someone with limited storage may need furniture that performs several functions.
A couple may have different privacy and storage requirements from someone living alone.
That is why copying another person’s studio bedroom exactly is not always the answer.
The better approach is to understand the principles and then apply them to your own space.
To explore more studio apartment layout ideas, visit our Studio Apartment Layout Inspirations page for additional ideas across different compact-space layouts.
The Final Studio Apartment Bedroom Check
Before you consider the bedroom area finished, ask yourself:
Can I sleep comfortably here?
Can I move around the studio without constantly working around furniture?
Does the sleeping area have the level of privacy I actually need?
Have I protected the natural light?
Have I considered airflow and ventilation?
Have I considered noise?
Can I reach the storage I use regularly?
Can I get to the bathroom easily at night?
Does the space still work during the day?
If I work from home, can I separate work from rest?
Have I avoided unnecessary furniture?
Is tall furniture properly secured where necessary?
If the answer to these questions is yes, you are not simply decorating a bedroom corner.
You are creating a sleeping zone that works with the rest of the studio.
A Note From Josiah Digital Hub
At Josiah Digital Hub, we look at compact living from a problem-solving perspective.
The purpose of this guide is not to tell every studio-apartment resident to use the same bed, divider, furniture or layout.
Instead, the aim is to help you understand the problem before choosing the solution.
A studio apartment has limited space, but limited space does not mean every decision has to be a compromise.
When you understand circulation, privacy, light, airflow, storage, noise and your own daily routine, you can make more informed choices about how the space should work.
That is the approach behind our studio-apartment content:
Understand the problem. Explore the options. Consider the trade-offs. Then choose what fits your life.
Discover more from Josiah Digital Hub
Subscribe to get the latest posts sent to your email.