
Studio Apartment Home Office Ideas: Creating an Inspiring Workspace in a Small Room
- Why Is a Home Office Difficult in a Studio Apartment?
- Start By Understanding How Your Studio Apartment Already Works
- Step 1: Map Your Studio Apartment Before Choosing A Desk
- Step 2: Choose The Right Work Zone
- Step 3: Decide How Visible Your Workspace Should Be
- Step 4: Choose a Desk That Fits the Room
- Step 5: Choose a Comfortable Chair
- Step 6: Set Up Your Screen and Work Surface Properly
- Step 7: Use Lighting Without Creating Glare
- Step 8: Use Vertical Space for Storage
- Step 9: Control Cables And Small Items
- Step 10: Create a Work-to-Home Transition
- Try a 3-Minute Shutdown Routine
- Make The Workspace Disappear Visually
- Step 11: Make The Workspace Inspiring, Not Just Functional
- Step 12: Choose A Background For Video Calls
- Studio Apartment Home Office Layout Ideas
- Common Studio Apartment Home Office Mistakes
- How To Test Your Workspace Before Buying More Furniture
-
A Simple Studio Apartment Home Office Planning Method
- 1. Identify Everything Your Studio Must Do
- 2. Identify What Your Work Requires
- 3. Map The Existing Room
- 4. Identify Possible Work Zones
- 5. Choose The Appropriate Level Of Separation
- 6. Select The Desk Type
- 7. Plan The Chair
- 8. Position Your Screen
- 9. Plan Lighting
- 10. Add Vertical Storage
- 11. Control Cables
- 12. Create A Shutdown Routine
- 13. Test The Layout
- 14. Reassess
- The Small Studio Apartment Home Office Checklist
- How To Make A Studio Apartment Home Office Feel Bigger
- What Makes a Studio Apartment Home Office Successful?
- Final Thoughts: Your Studio Can Be Both Home and Workplace

Working from home in a studio apartment can feel like trying to fit two different lives into one room.
The same space may need to function as your bedroom, living room, dining area, storage area, entertainment space, and home office.
That creates a simple but important question:
How can you create a proper workspace without making your entire studio apartment feel like an office?
The answer is not always buying a smaller desk.
Good studio apartment home office ideas start with understanding how the entire room works. You need to consider where you sleep, where you relax, how you move through the apartment, where natural light enters, where you store your belongings, and what happens to the workspace when your working day is finished.
This guide takes you through that process step by step.
You will learn how to choose a work zone, decide between an open or hidden workspace, select a compact desk, position your screen, manage lighting, use vertical storage, control cables, and create a clear transition between work and home life.
The goal is simple:
Create a workspace that supports your work without allowing work to take over your studio apartment.
Why Is a Home Office Difficult in a Studio Apartment?
A studio apartment does not give you the luxury of closing a door when work is finished.
In a traditional apartment, you might have a bedroom, living room, kitchen, and separate office. In a studio, several of these functions share the same open area.
This creates three common problems.
Your Workspace Can Take Over the Room
A large desk, office chair, monitor, printer, cables, storage boxes, and paperwork can quickly make the entire apartment feel like a workplace.
Even when the desk itself is small, visual clutter can make the room feel much smaller.
The solution: Instead of simply choosing the smallest desk available, plan a workspace that controls equipment, storage, and visual clutter from the beginning.
Work And Rest Can Become Too Close
If your desk is directly beside your bed, you may find yourself looking at unfinished work when you are supposed to be relaxing.
The problem is not necessarily the physical distance.
It is the lack of a visual and psychological boundary.
The solution: Use furniture orientation, open shelving, curtains, plants, or another simple visual cue to make the work zone feel different from the sleeping zone.
Every Piece Of Furniture Has To Earn Its Space
A studio apartment has limited floor area.
A piece of furniture that performs only one job may be difficult to justify when another piece can perform two or three functions.
This is why multifunctional furniture, intentional separation, and careful planning appear repeatedly in successful small-apartment layouts.
The solution: Choose furniture based on what your studio actually needs, while making sure multifunctionality does not compromise comfort or everyday use.
Before buying multifunctional furniture, however, start with the room itself.
Start By Understanding How Your Studio Apartment Already Works
Before choosing a desk, look at what your studio apartment is already doing.
Think of the room as a collection of zones rather than one large open space.
You may already have:
A sleeping zone
A living or relaxation zone
A kitchen zone
A dining zone
A storage zone
A circulation path
An entrance area
A potential work zone
Your home office needs to fit into this existing system.
It should not force you to rebuild the entire apartment around one desk.
Think About Your Type Of Work
Not everyone needs the same workspace.
Someone who works mainly from a laptop may need only a small surface and comfortable chair.
Someone who spends hours on video calls may need better lighting, a suitable background, and enough space for a camera.
Someone who studies may need room for notebooks and books.
Someone doing creative work may need a larger working surface.
Someone using multiple monitors may need considerably more desk depth and cable management.
So ask yourself:
What does my work actually require?
Write down the equipment you use regularly.
For example:
Laptop
Monitor
Keyboard
Mouse
Headphones
Notebook
Documents
Phone
Desk lamp
Printer
Chargers
External storage
This list becomes your workspace requirement.
Do not start with furniture. Start with the work.
Before deciding where your home office should go, it can help to see how other compact spaces are arranged. Explore our studio apartment layout ideas for practical examples of how sleeping, living, storage, and workspace zones can work together.
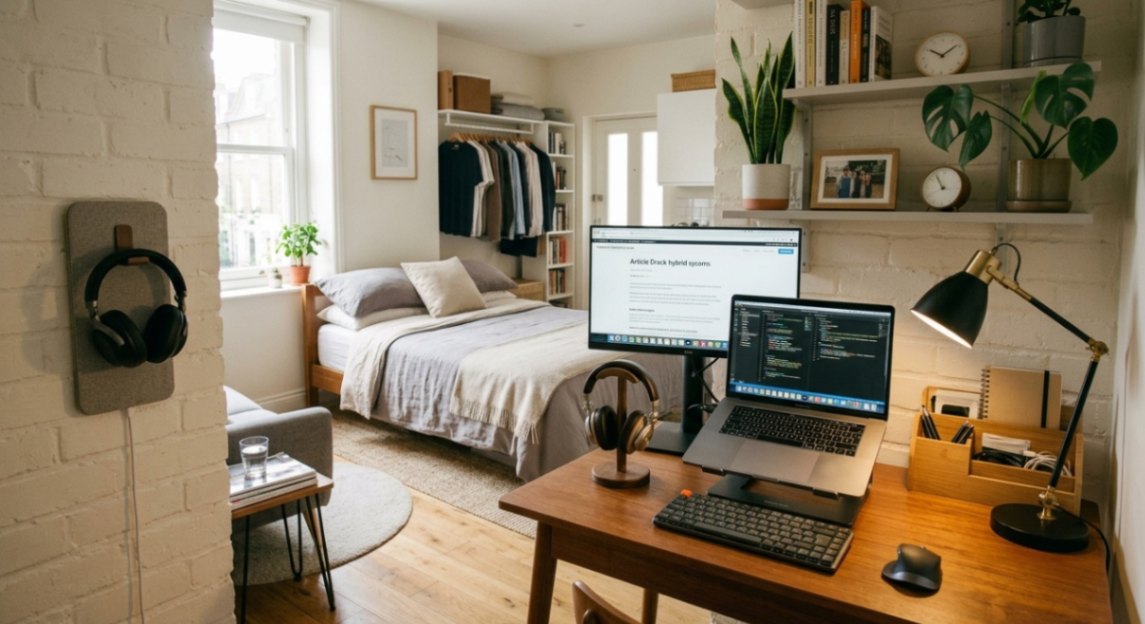
Step 1: Map Your Studio Apartment Before Choosing A Desk
Do not buy a desk first.
Walk around your studio apartment and identify areas that could potentially support a workspace.
Look for:
An unused section of wall
A corner beside the living area
Space near a window
The wall behind a sofa
An underused section beside a wardrobe
A circulation area that could accommodate a very shallow desk
A closet that could become a hidden office
Space beside a media console
An elevated or multifunctional furniture area
A section within the bedroom zone
The best location is not always the largest empty area.
Sometimes a narrow wall can provide enough space for a desk while preserving the main circulation path.
The solution: Before purchasing furniture, test different possible locations and consider how each one affects movement, storage, natural light, and the other functions of the room.
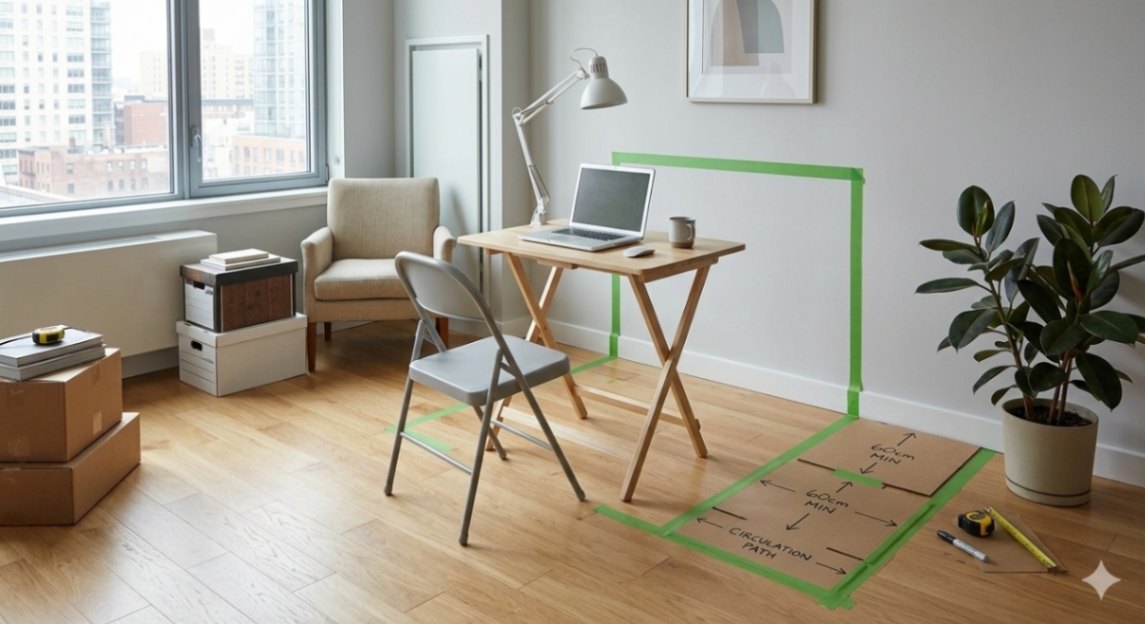
Create A Simple Floor-Plan Test
You do not need professional design software to test your ideas.
A simple sketch on paper can be enough.
Draw the main elements of your studio apartment:
Bed
Sofa
Kitchen
Bathroom
Entrance
Storage
Windows
Doors
Then mark the areas where a workspace could potentially fit.
This simple exercise can reveal problems that may not be obvious when you are simply looking around the room.
For example, a desk might appear to fit against a wall, but once you draw the chair and allow enough space to move around it, the location may become less practical.
The same test can help you compare several possible work zones before buying anything.
Planning first can prevent you from creating obstacles that make the rest of your studio harder to use.
The solution: Treat your floor plan as a test. If the workspace works on paper without blocking important paths or functions, you have a stronger starting point for the real setup.

Step 2: Choose The Right Work Zone
There is no single perfect location for a studio apartment home office.
The best position depends on your room, your work, your natural light, your furniture, and how much separation you need.
Here are several possibilities to consider.
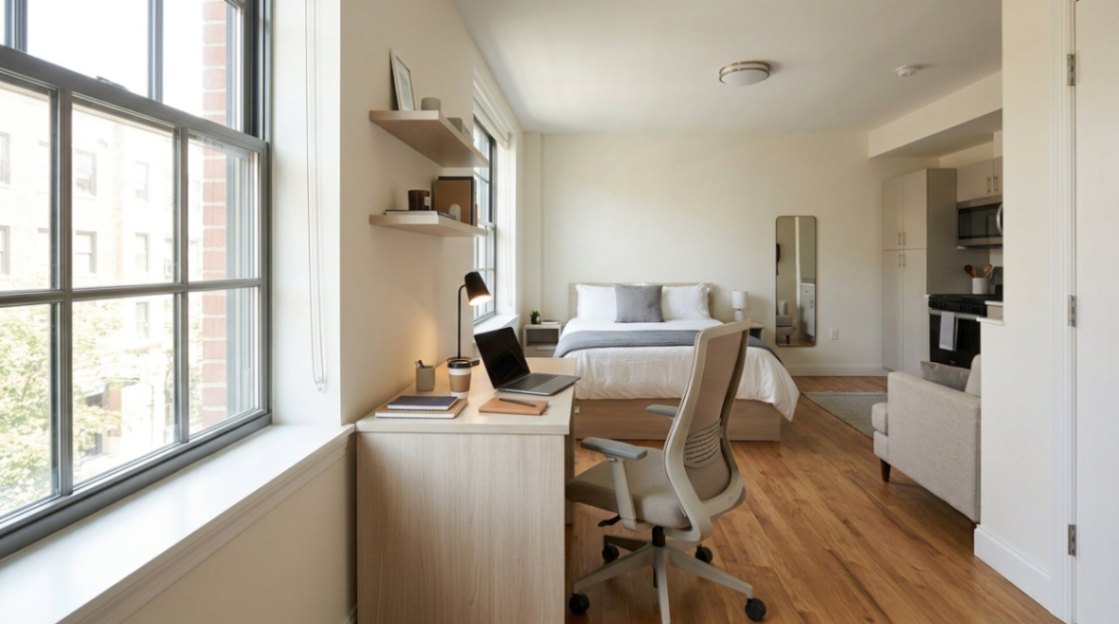
Near A Window
A window can provide natural light and make a small workspace feel more open.
A desk positioned near a window may also give you a more pleasant view during the working day.
However, avoid positioning the screen so that strong daylight creates distracting reflections.
Your screen and window should be arranged thoughtfully rather than simply placing the desk directly in front of the glass.
If possible, position the screen so the window is to the side rather than directly behind or directly in front of it.
This can help reduce reflections and extreme contrast.
In The Living Area
Your living area may contain one of the most useful pieces of furniture in the entire studio: the sofa.
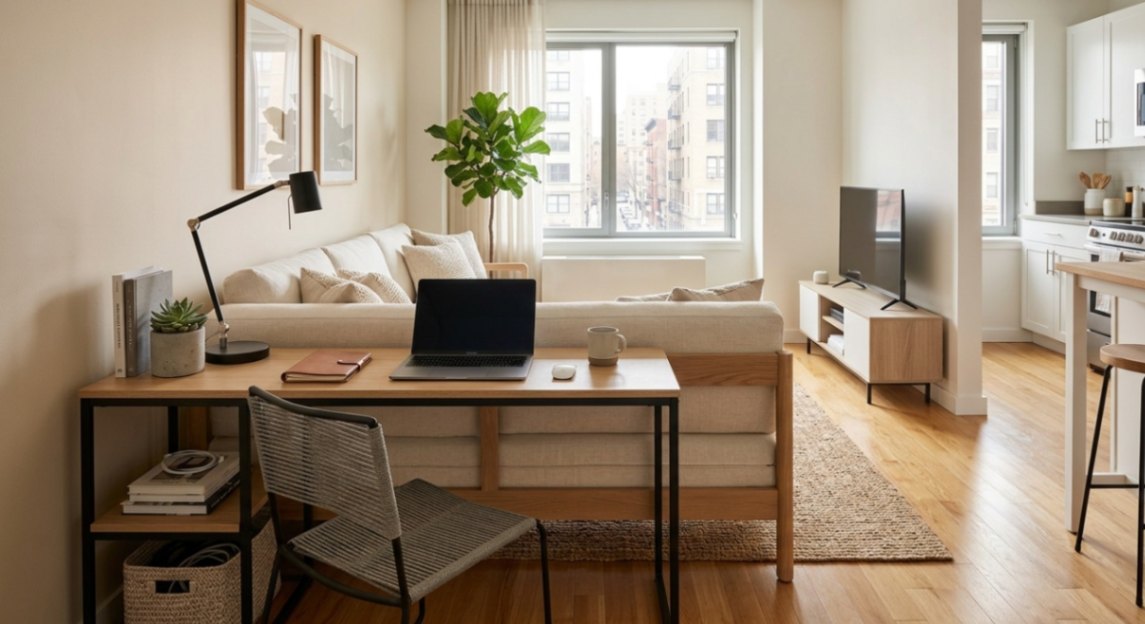
The area around the sofa can sometimes accommodate a compact desk, console-style workspace, or floating desk.
A particularly useful approach is to allow the workspace to visually belong to the living zone rather than making it look like a separate office inserted into the room.
For example, a compact desk can use similar materials, colors, or visual proportions to the nearby furniture.
This makes the workspace feel intentional.
If your living area is also where you spend most of your free time, the relationship between the desk and sofa becomes especially important. Our guide to Living Space Inspirations in a Studio Apartment can provide further ideas for arranging compact living zones without making them feel overcrowded.
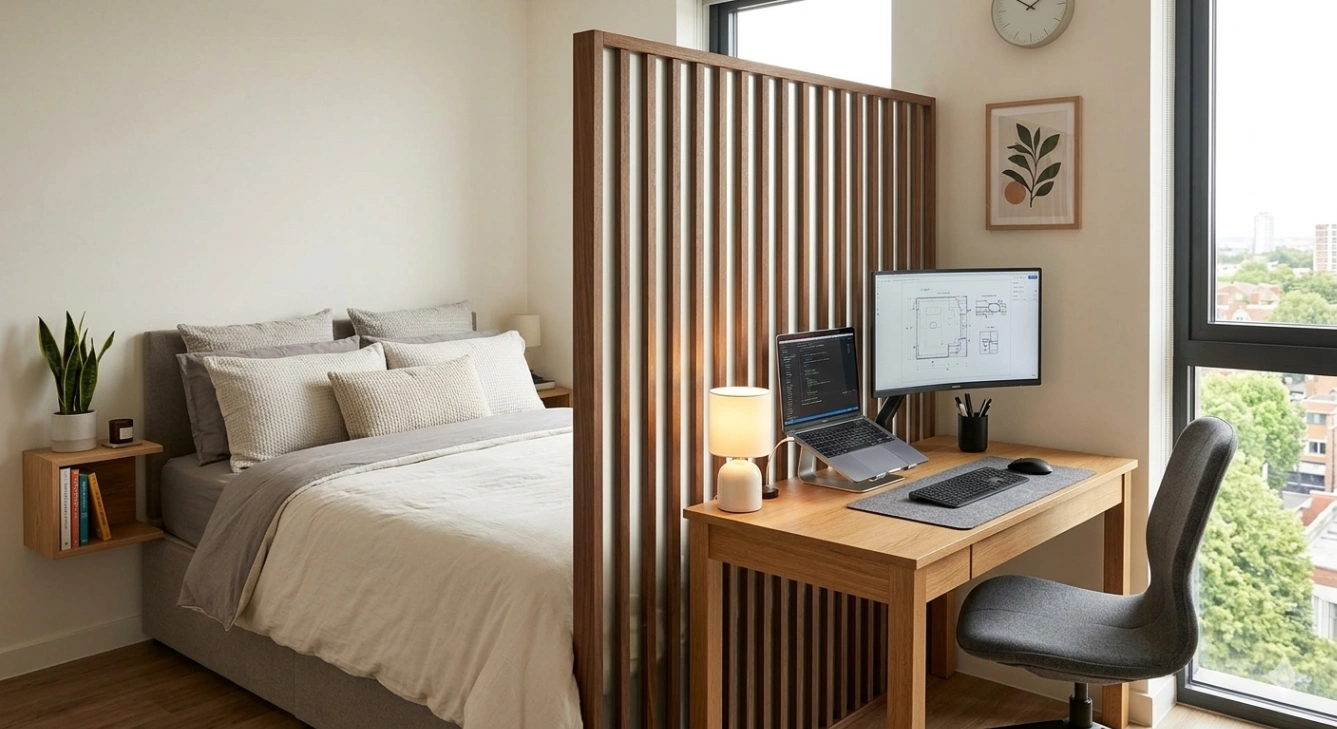
Beside The Sleeping Zone
Sometimes the sleeping area is the only practical place available.
If this is your situation, avoid placing the desk so close to the bed that the two functions visually merge.
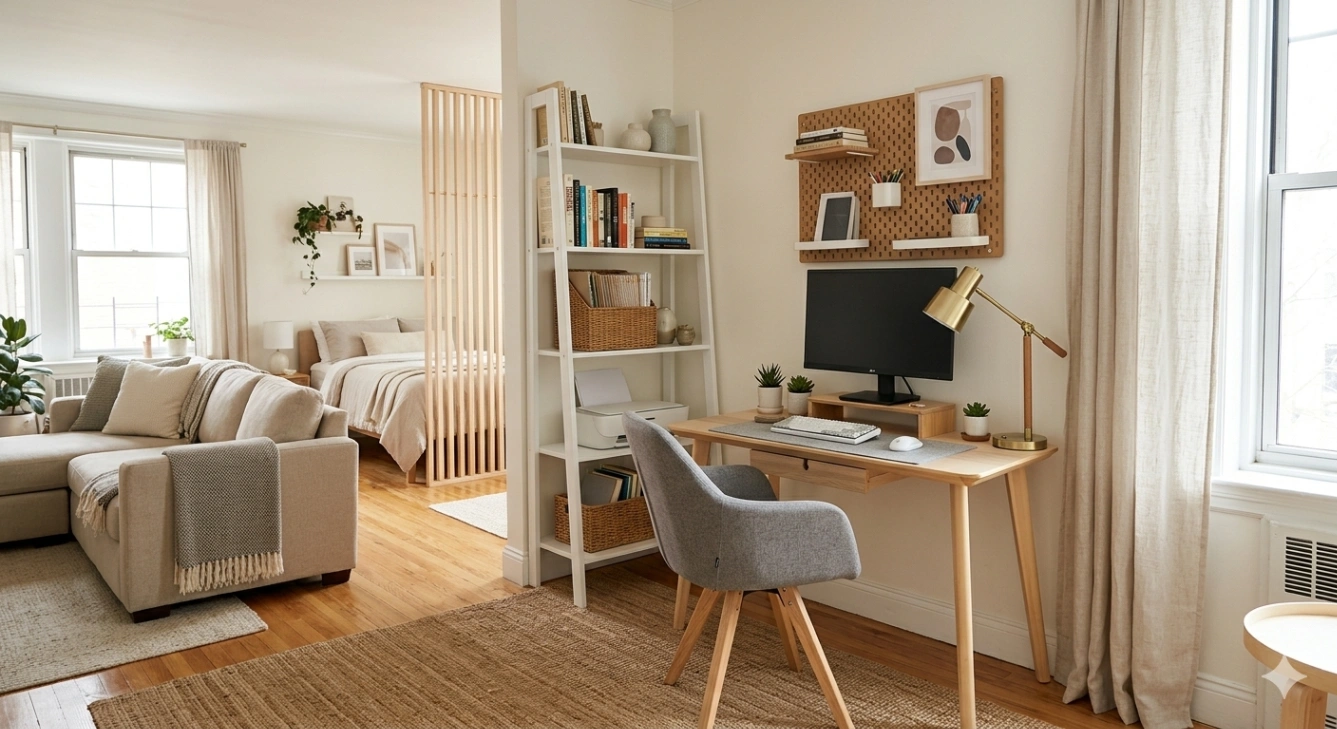
A small divider, open shelving unit, curtain, plant arrangement, or change in furniture orientation can create some separation.
You do not necessarily need a solid wall.
Even a change in orientation can tell your brain:
This is where I work. That is where I rest.

Inside A Closet
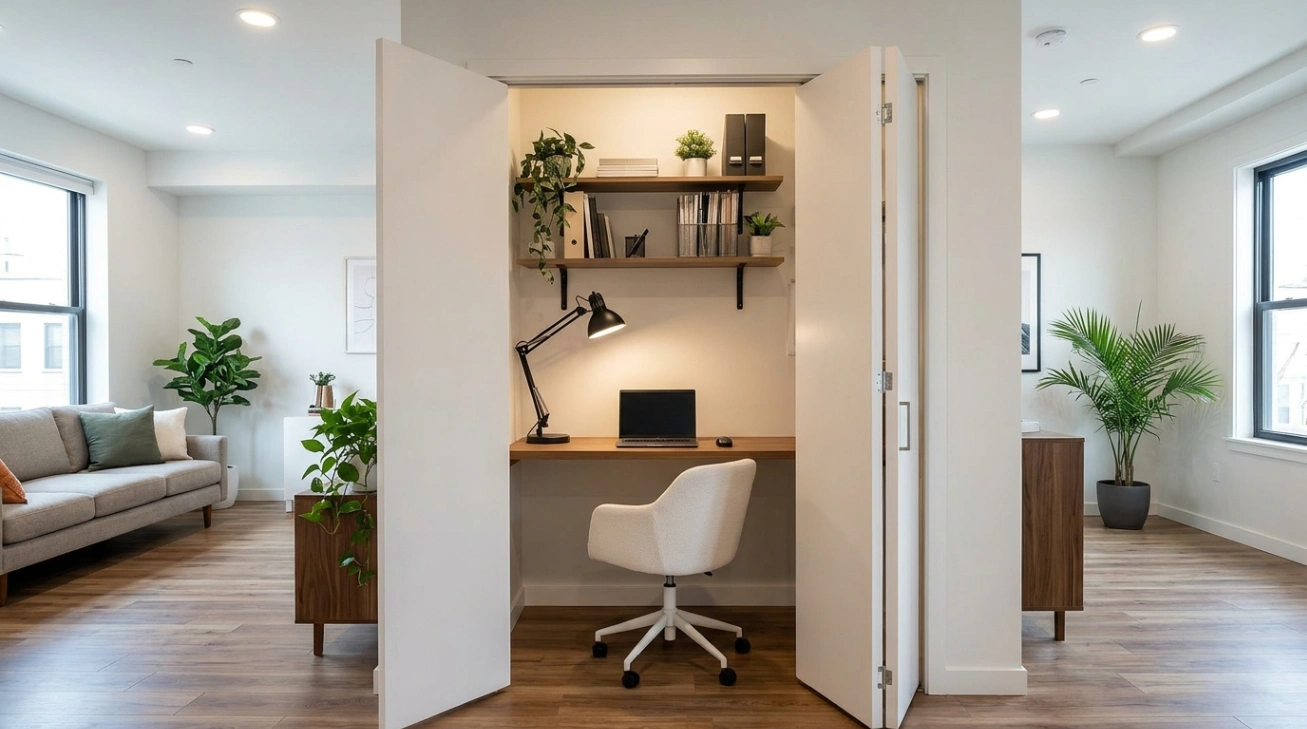
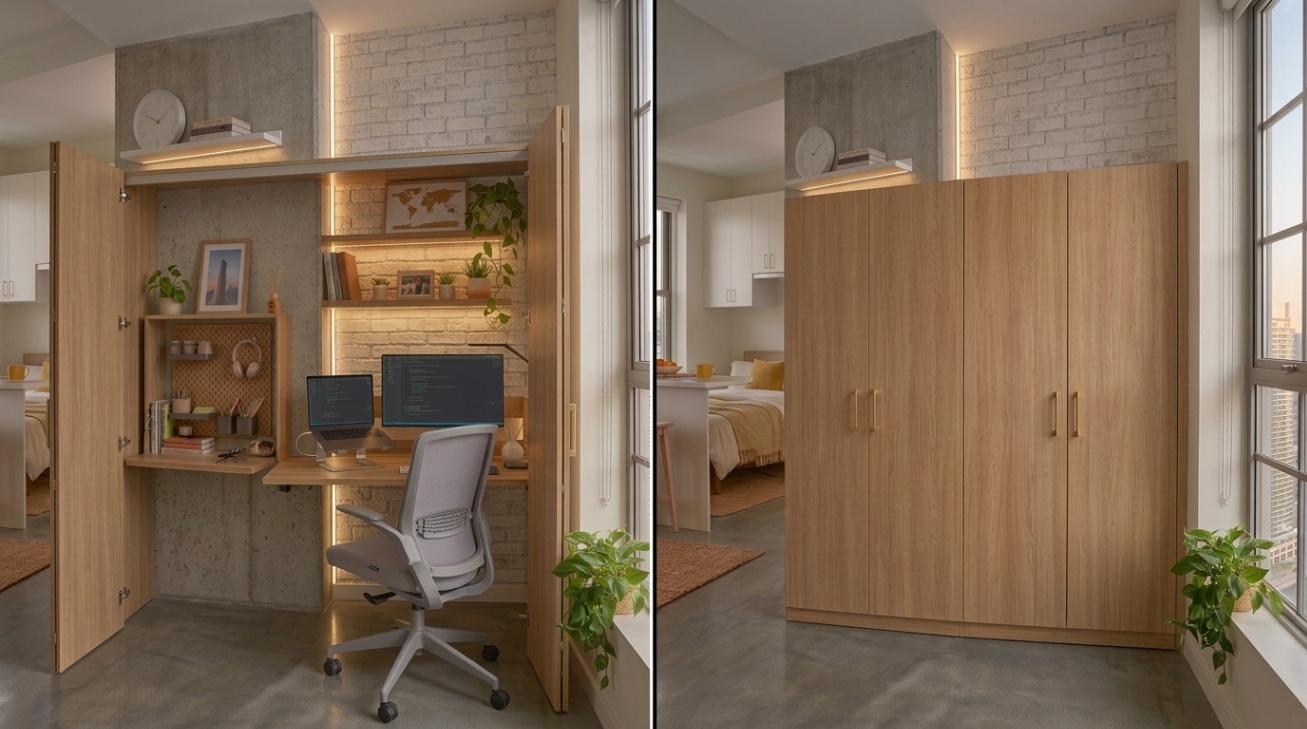
A closet office, often called a cloffice, can be one of the most space-efficient solutions for a studio apartment.
Instead of adding another large piece of furniture to the room, you use an existing enclosed space.
A compact work surface can occupy the lower portion while shelves above hold work materials.
When the working day is finished, the doors can potentially hide the workspace.
This approach is particularly useful if visual separation is important to you.
However, make sure the space has adequate ventilation, lighting, electrical access, and enough room for comfortable use before converting it into a regular workstation.
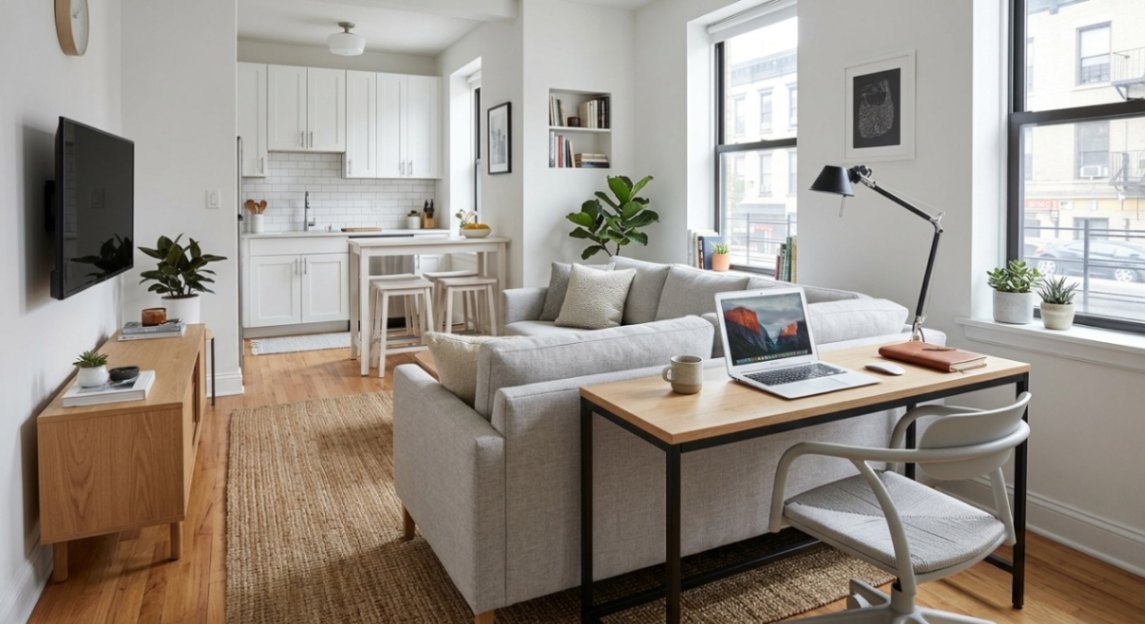
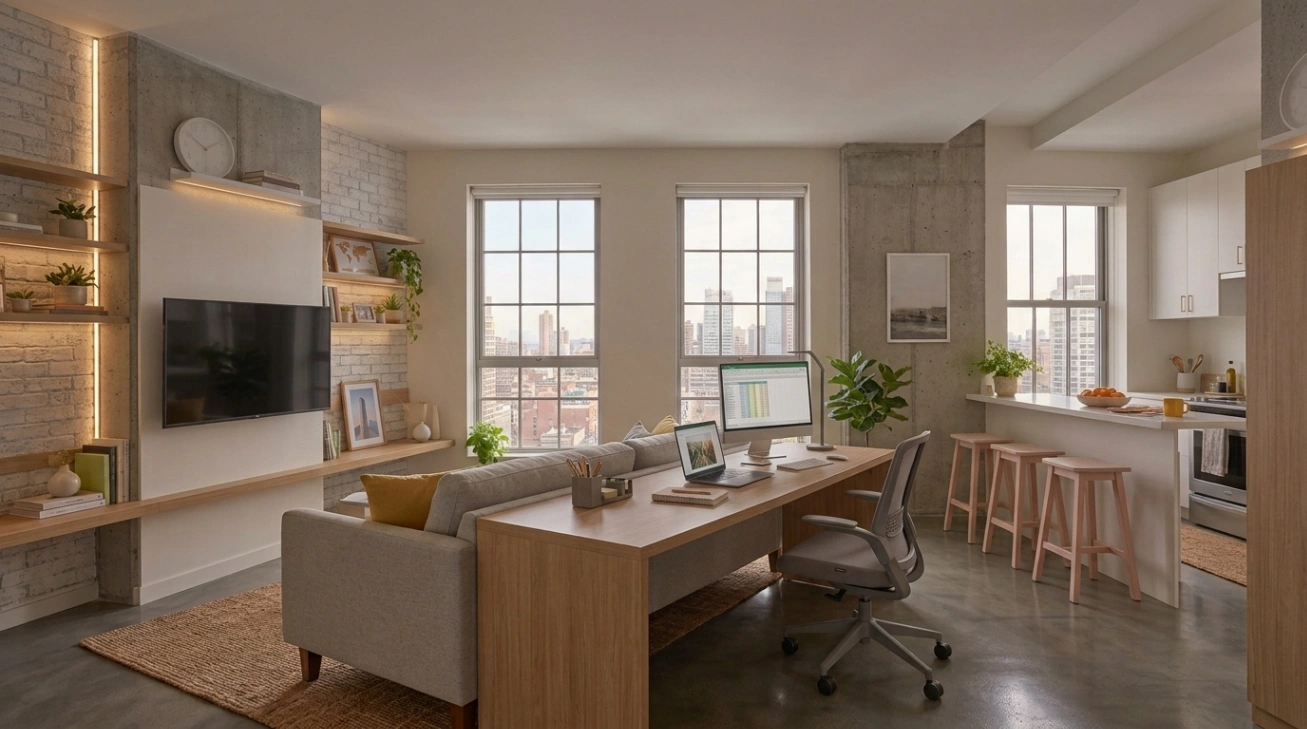
Behind the Sofa
The wall or space behind a sofa is easy to overlook.
If the sofa is already positioned away from the wall, a slim desk or console-style workstation may fit behind it.
This can create a natural division between living and working areas.
It also allows the desk to serve as part of the living-space arrangement rather than creating another isolated furniture island.
Step 3: Decide How Visible Your Workspace Should Be
Before selecting the desk, decide how much of your office you want to see when you are not working.
There are three useful approaches.
Open Workspace
An open workspace remains visible all the time.
This is often the simplest option.
It works well when:
- You work mainly from a laptop
- You have limited equipment
- You keep the desk tidy
- You do not mind seeing your workspace after work
The advantage is simplicity.
The disadvantage is that the visual reminder of work never completely disappears.
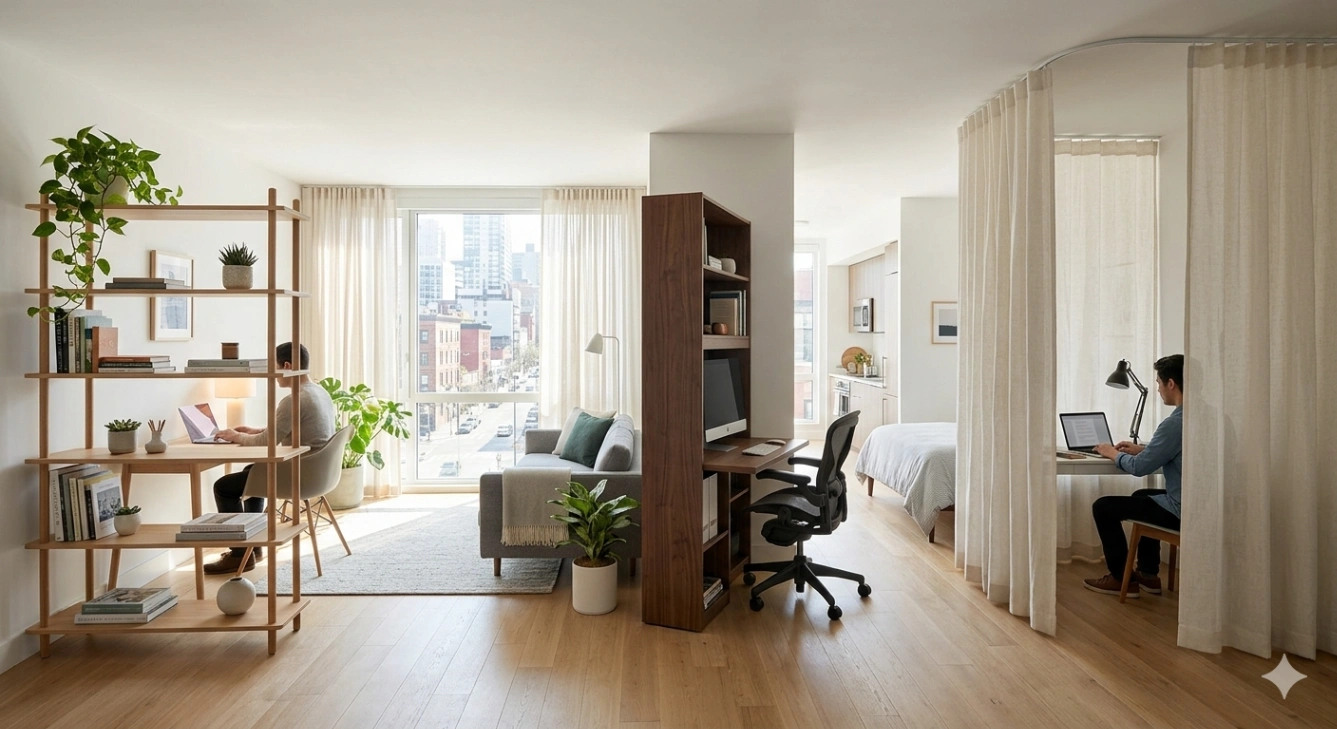
Partially Separated Workspace
A partially separated office creates a boundary without completely closing the workspace.
Possible solutions include:
- Open shelving
- A narrow bookcase
- A curtain
- A folding screen
- A tall plant arrangement
- Furniture orientation
- A change in rug
- A different wall treatment
The objective is not to build a wall.
It is to create a visual cue.
Fold-Away Or Hidden Workspace
If your studio apartment is extremely compact, a workspace that disappears may be the most practical approach.
Possibilities include:
- Fold-down desks
- Drop-front desks
- Cabinet desks
- Closet offices
- Folding tables
- Convertible furniture
- A compact desk that can be cleared and repurposed
The important question is:
What happens to the workspace when work is finished?
That question should be answered before you buy the furniture.
Step 4: Choose a Desk That Fits the Room
A desk does not need to look like a traditional office desk.
In a studio apartment, the best desk is usually the one that supports your work while respecting the rest of the room.
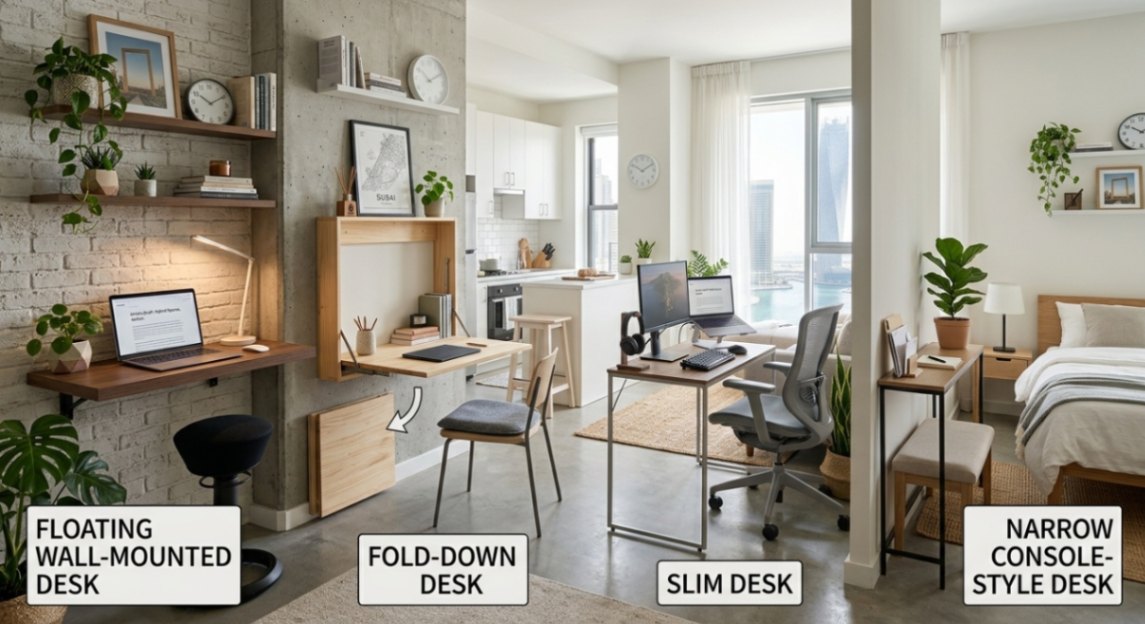
Slim Desk
A slim desk can work well when you need a simple laptop-based setup.
It can fit against a wall without consuming as much floor space as a large workstation.
Before choosing one, make sure the depth is still sufficient for your equipment and comfortable working position.
Do not make the desk so shallow that your keyboard, mouse, screen, and other frequently used items are forced into an uncomfortable arrangement.
Floating Desk
A floating desk attaches to the wall rather than using large legs.
This can create a visually lighter workspace.
The open floor underneath can also make the room feel less crowded.
A floating desk can work particularly well in:
Narrow walls
Corners
Closet conversions
Living areas
Bedroom-side work zones
If you rent your apartment, consider whether drilling into the wall is permitted.
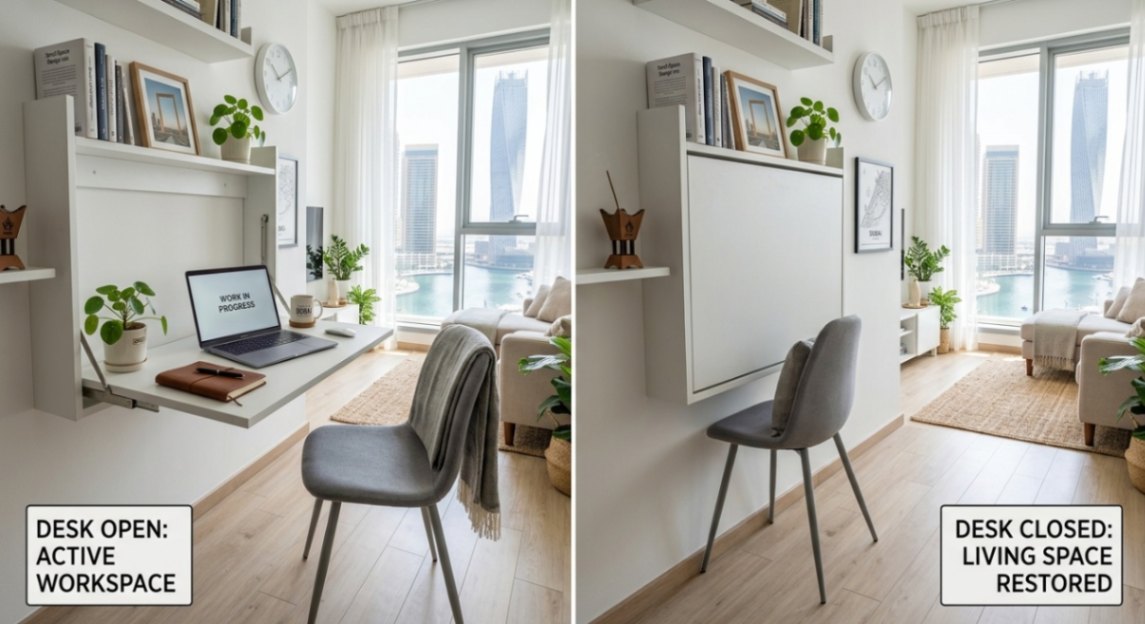
Fold-Down Desk
A fold-down desk is designed to disappear when it is not being used.
This is useful when the same section of the apartment needs to serve another purpose.
For example, the desk can become a work surface during the day and fold away when you want the room to return to its home function.
Console-Style Desk
A narrow console-style surface can blend into a living room more easily than a conventional office desk.
This can be particularly useful if you want your workspace to look like part of the home rather than a separate office.
Dual-Purpose Furniture
A piece of furniture can sometimes serve two jobs.
Examples include:
Desk + storage
Desk + dressing area
Desk + media console
Desk + display shelf
Fold-down desk + cabinet
Work surface + dining surface
However, multifunctionality should not become an excuse for poor ergonomics.
If a dining table is technically a desk but leaves you uncomfortable after several hours, it may not be the right primary workstation.
When choosing workspace equipment, explore the Product Index for relevant options that can suit a compact studio apartment setup.
Step 5: Choose a Comfortable Chair
A compact desk can save space.
A poor chair can make the entire workspace frustrating.
Your chair should support the amount of time you actually spend working.
If you work for several hours a day, consider:
- Back support
- Seat height
- Foot position
- Arm position
- Ability to change posture
- Space needed to move the chair
- Whether the chair can visually fit the room
The goal is not to buy the largest office chair available.
It is to create a workstation that supports comfortable working while respecting the limited space of the apartment.
Make The Chair Part Of The Layout
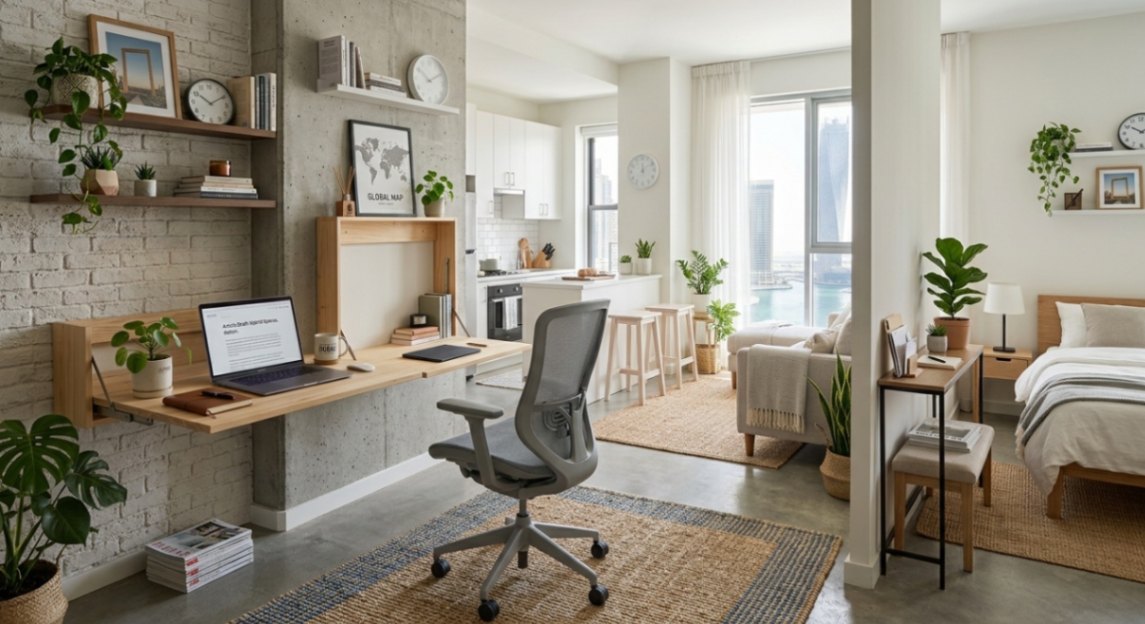
Measure the space required to pull the chair out.
A desk may physically fit against a wall, but if there is not enough room behind it to sit down and move comfortably, the layout is not really functional.
Remember:
The workspace includes the chair space, not just the desk footprint.
Step 6: Set Up Your Screen and Work Surface Properly
Once the desk and chair are selected, set up the equipment.
This is where a beautiful workspace can become uncomfortable if ergonomics are ignored.
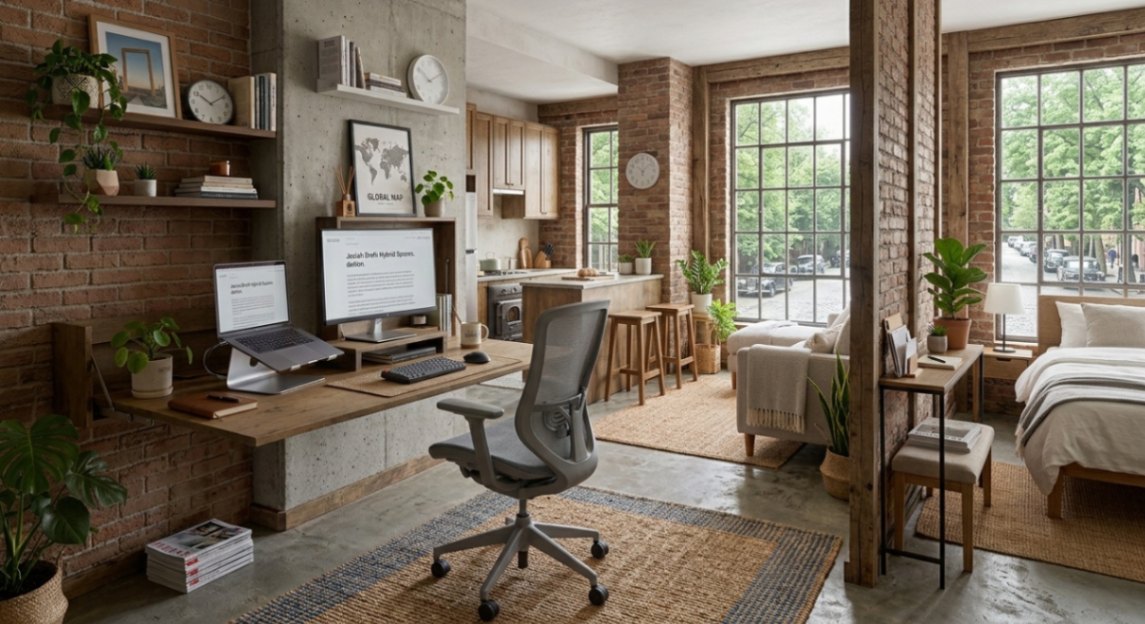
For computer work, consider the relationship between the monitor, keyboard, desk, chair, and your normal viewing position.
Keep The Monitor Directly In front Of You
Avoid constantly turning your head toward a screen positioned far to one side.
Your main screen should generally be where you naturally look.
Consider The Screen Height
The top of the screen should not be unnecessarily high.
A laptop can create a special problem because the screen and keyboard are permanently connected.
If you raise the laptop to improve screen height, you may also need an external keyboard and mouse.
This is especially useful for people who use a laptop as their primary computer for long periods.
Keep Frequently Used Items Close
Your keyboard and mouse should be positioned so that you are not repeatedly reaching across the desk.
The smaller your work surface, the more important organization becomes.
A compact desk can work surprisingly well when the items on it have been selected carefully.
For more detailed guidance on setting up a comfortable computer workstation, see the Occupational Safety and Health Administration (OSHA) Computer Workstations guide, which covers monitor, keyboard, mouse, desk, and chair positioning.
Step 7: Use Lighting Without Creating Glare
Good lighting can completely change the feeling of a small workspace.
A dark corner can feel cramped.
A well-lit corner can feel intentional and inviting.
But more light is not automatically better.
The goal is controlled light.
Use Natural Light Carefully
Natural light can make a workspace feel more pleasant, but direct light can create reflections on your screen.
Instead of asking:
“Where can I put my desk near the window?”
Ask:
“Where can I use the window light without creating screen glare?”
That small change in thinking can produce a better layout.
Add Task Lighting
A small desk lamp can provide focused light when natural light is insufficient.
Choose a lamp that does not create a strong reflection on the screen.
Add Ambient Light
The desk should not necessarily be the only illuminated area in the room.
A small studio can feel more balanced when the workspace has some relationship with the surrounding lighting.
This may include:
Ceiling lighting
Wall lighting
Floor lighting
Desk lighting
Soft ambient lighting
The result is a workspace that belongs to the apartment rather than looking like a brightly illuminated workstation dropped into a dark room.

Step 8: Use Vertical Space for Storage
When floor space is limited, look upward.
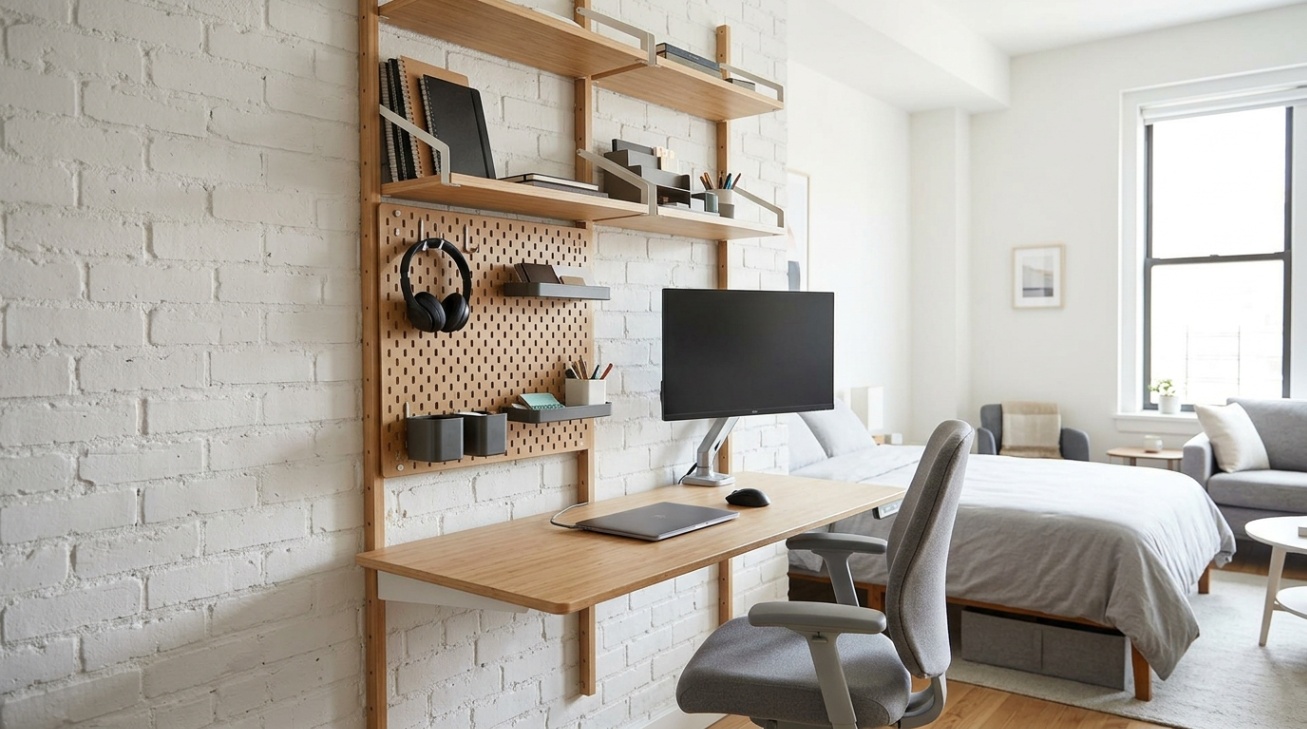
Walls can provide valuable storage without taking as much floor area as additional cabinets.
Consider:
Floating shelves
Pegboards
Wall-mounted organizers
Narrow shelving
File holders
Small baskets
Hooks
Vertical book storage
A useful rule is:
Store frequently used items close to the desk and rarely used items farther away.
For example, your notebook and headphones may deserve immediate access.
Old documents or backup equipment can go somewhere less convenient.
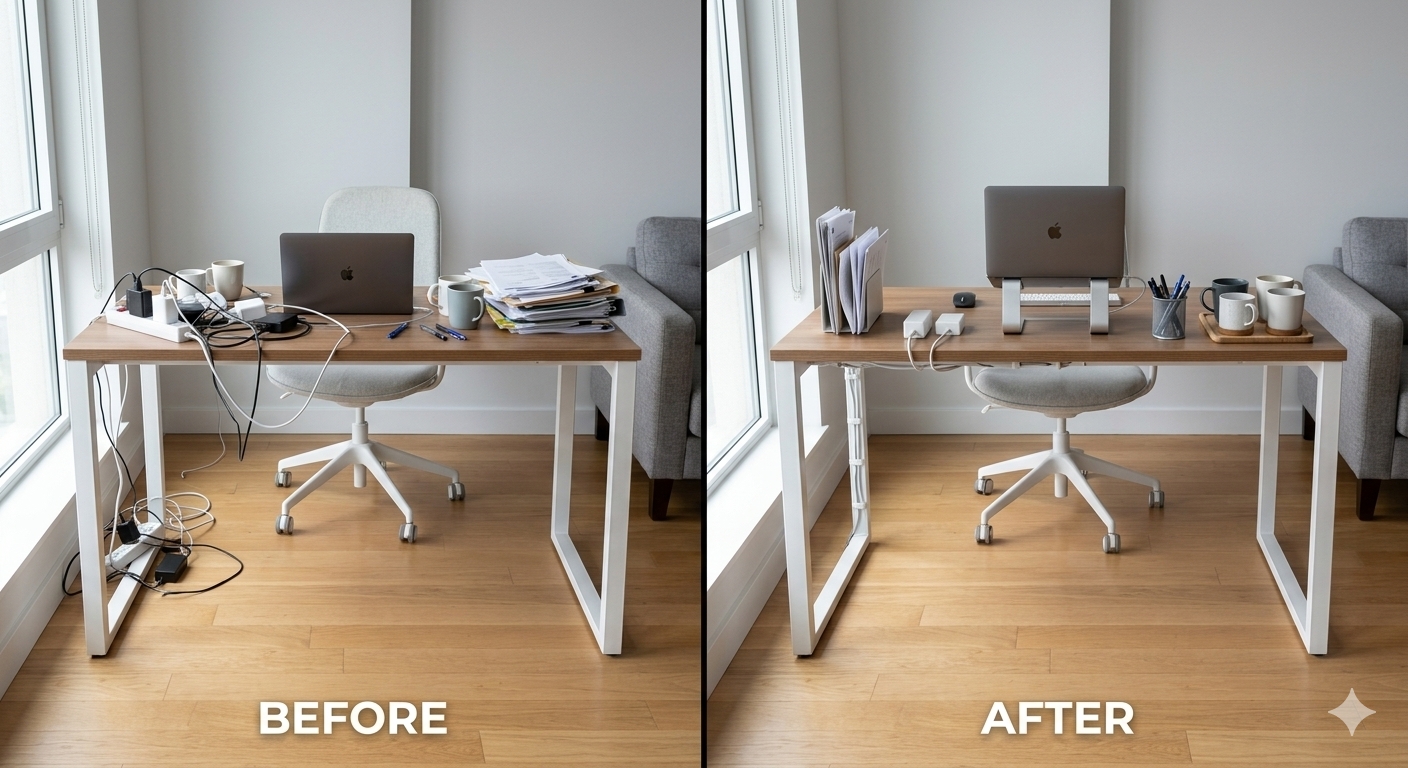
Keep The Work Surface Clear
The desk should not become a permanent storage shelf.
Try to keep only the items you use regularly on the main work surface.
This creates two benefits.
First, the desk remains functional.
Second, the room looks calmer when you finish work.
Step 9: Control Cables And Small Items
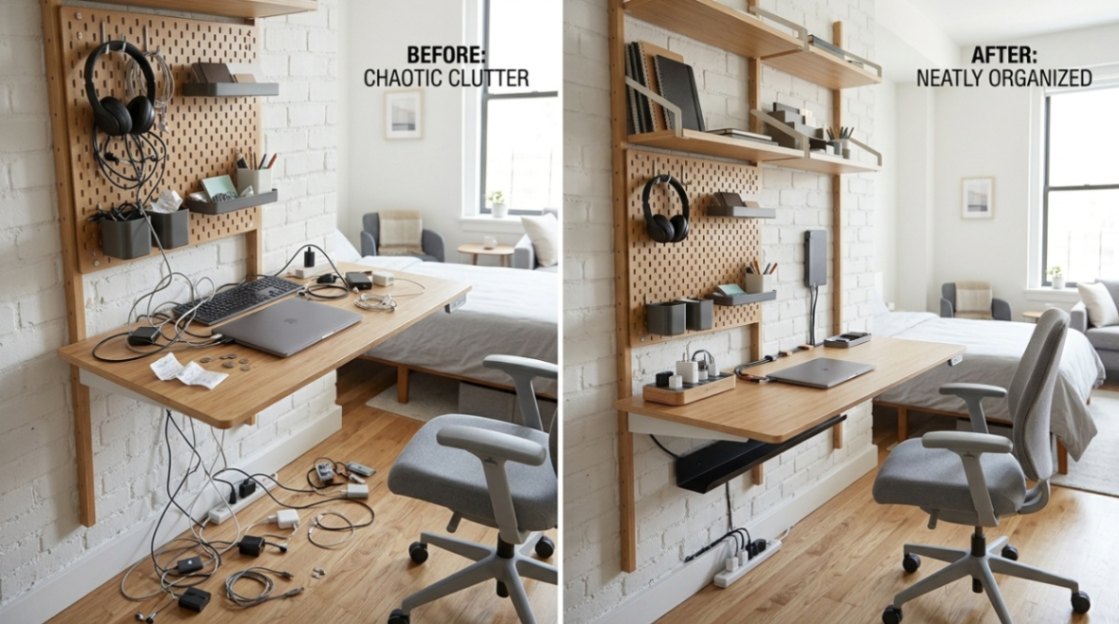
Cables are easy to underestimate.
One laptop charger may not look like a problem.
Add a monitor.
Then a keyboard.
Then a mouse.
Then headphones.
Then a phone charger.
Suddenly, a small desk has become a network of cables.
Create A Simple Cable System
You can use:
Cable clips
Cable sleeves
Under-desk cable trays
Velcro straps
A small charging station
Adhesive cable organizers
The goal is not to make every cable invisible.
The goal is to prevent cables from spreading across the desk and floor.
Give Every Small Item A Home
Create a designated place for:
Pens
Chargers
Headphones
Notebooks
Documents
USB drives
Adapters
Small electronics
This prevents the classic studio-apartment problem where one small pile becomes three larger piles.
Step 10: Create a Work-to-Home Transition
This is one of the most important parts of a studio apartment home office.
In a separate office, finishing work can be as simple as walking out and closing the door.
In a studio apartment, the office is still sitting in the same room.
You therefore need a deliberate transition.
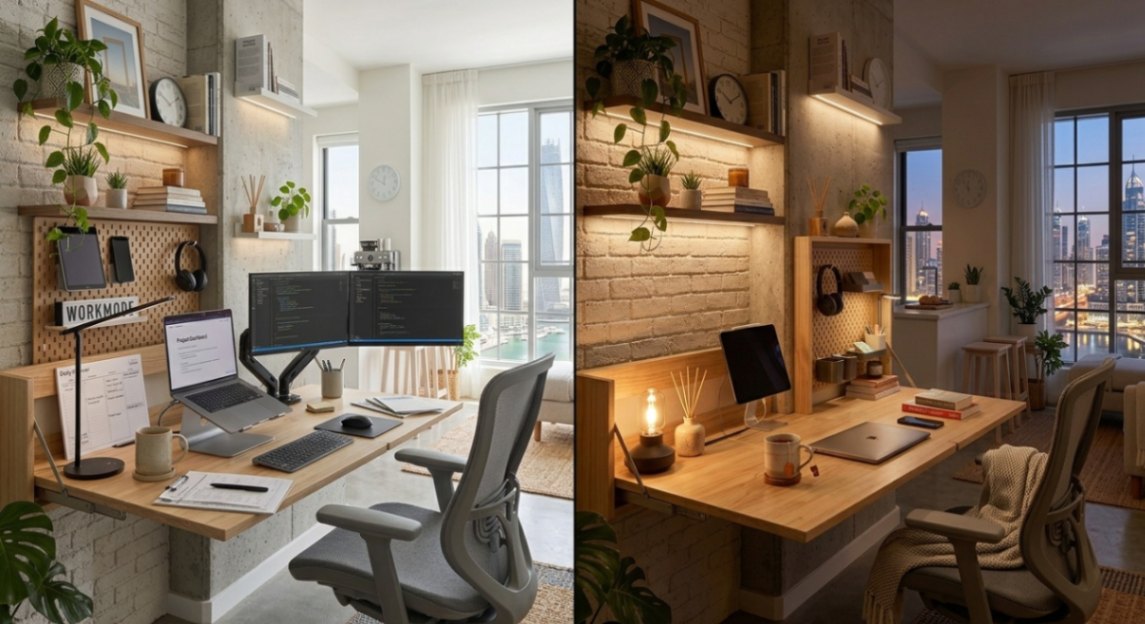
Try a 3-Minute Shutdown Routine
At the end of your working day:
- Save your work.
- Close unnecessary applications.
- Put away notebooks and documents.
- Return small equipment to its storage location.
- Manage your charging cables.
- Clear the main work surface.
- Turn off the task lighting.
- Close or fold away the workspace if possible.
- Change the lighting or activity in the room.
- Leave the workspace mentally as well as physically.
This routine can be very simple.
The important part is consistency.

Make The Workspace Disappear Visually
If your desk remains visible, you can still create a transition.
For example:
- Close a laptop.
- Put it into a drawer.
- Place a decorative object on the desk.
- Fold down the work surface.
- Close closet doors.
- Move the chair slightly away.
- Turn off task lighting.
The objective is not to pretend work never happened.
It is to make it easier for the room to return to its home function.
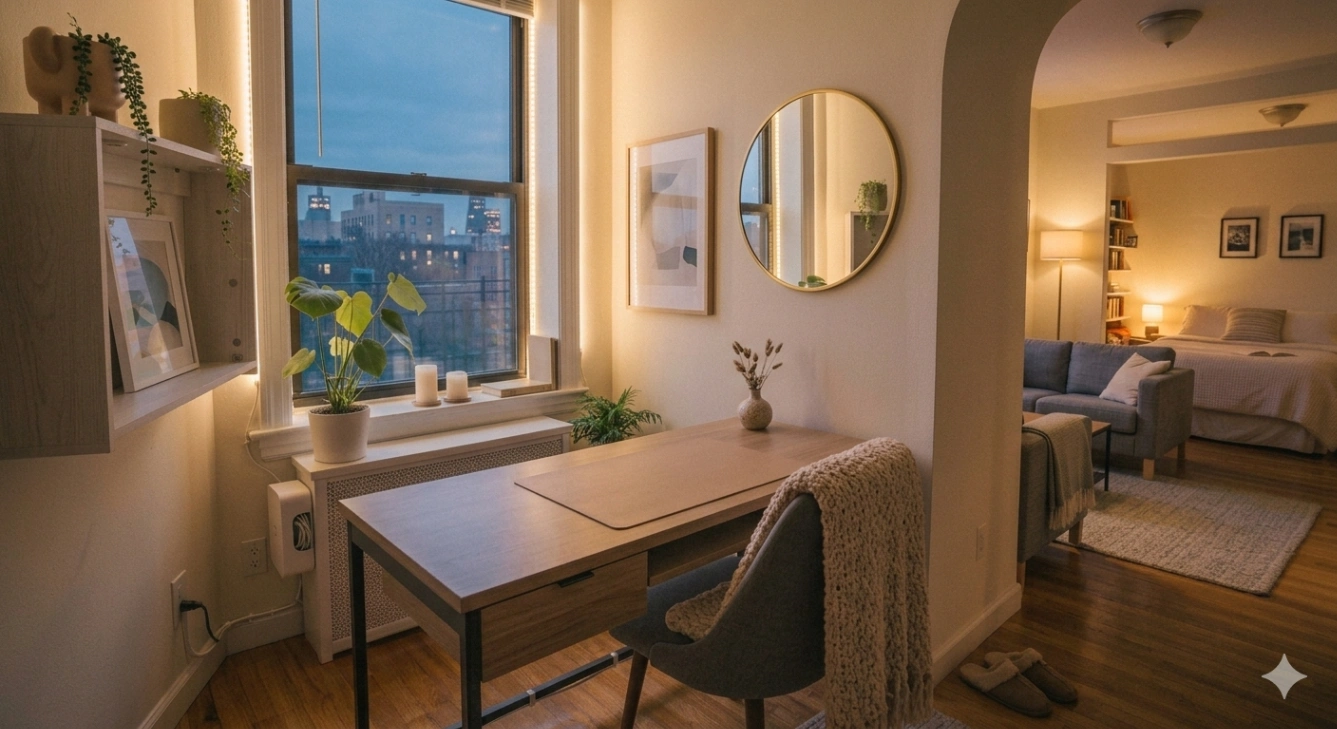
Step 11: Make The Workspace Inspiring, Not Just Functional
A home office should support concentration, but it should also feel pleasant to use.
This is especially important in a studio apartment because the workspace is part of your home environment.
You do not need a large collection of decorations.
A few carefully chosen elements can make the workspace feel more personal.
Add Personal Elements Carefully
Consider adding:
- One small plant
- A framed print
- A simple desk organizer
- A small decorative object
- A pinboard or inspiration board
- A favorite book
- A soft desk accessory
The key is to avoid turning the work surface into another storage area.
Choose items that make the workspace feel comfortable without taking away valuable working space.
Use Color Without Overloading The Room
Color can help define the workspace without physically separating it.
For example, you could introduce one consistent accent color through:
- A desk accessory
- A chair cushion
- Artwork
- A small rug
- Storage containers
- Decorative objects
You do not need to repaint the entire studio apartment.
A small amount of visual consistency can be enough to make the workspace feel intentional.
Let Natural Light Support The Space
If your workspace is near a window, make use of the natural light without allowing glare to interfere with your screen.
Keep the area around the window relatively clear.
This can make the workspace feel brighter during the day while also helping it connect naturally with the rest of the studio.
The goal is to create a workspace that feels like part of your home rather than a temporary desk placed wherever there was available space.
Step 12: Choose A Background For Video Calls
When your studio apartment is also your home office, the area behind you can become part of your professional workspace.
You do not need a separate room to create a suitable video-call background.
Keep The Background Simple
Avoid placing too many distracting objects directly behind your chair.
A simple background can include:
- A clean wall
- A small plant
- A bookshelf
- A piece of artwork
- A neatly arranged storage unit
- A curtain
- A well-organized section of the studio
The goal is to create a background that looks intentional without requiring a major change to your apartment.
Consider What The Camera Will Actually See
Before rearranging the entire room, sit at your desk and check the camera view.
You may discover that only a small section of the studio appears on screen.
This allows you to focus your effort on the visible area instead of trying to make the entire apartment look like a professional office.
Use Your Workspace As Part Of The Background
Your desk itself can contribute to the visual impression.
A clean desk, organized accessories, suitable lighting, and a simple background can make the workspace feel more intentional during video calls.
If possible, position the camera so that the background supports the purpose of the meeting without becoming the main focus.
Check The Background Before Important Calls
Take a few seconds to check:
- What appears behind you
- Whether the area looks cluttered
- Whether the lighting is balanced
- Whether personal items are visible
- Whether the camera angle is comfortable
- Whether the background distracts from your face
A quick check can prevent small problems from becoming distractions during an important call.

Studio Apartment Home Office Layout Ideas
Now that the planning principles are clear, it is easier to imagine how different arrangements can work.
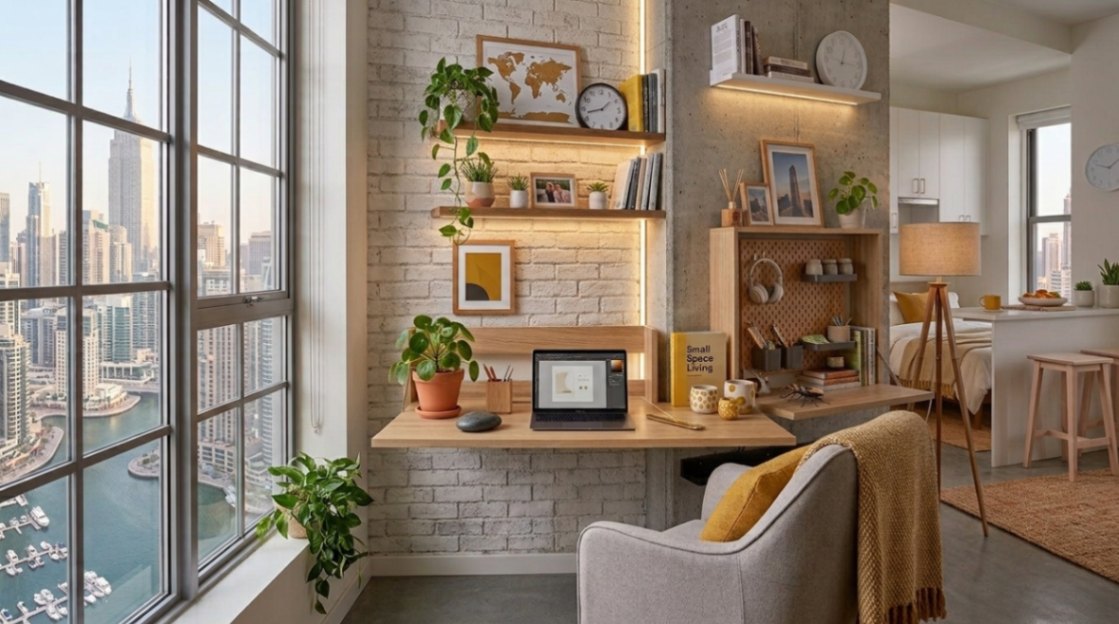
Layout 1: The Window Workspace
Place a compact desk close to a window while keeping the screen positioned to reduce glare.
Use:
- Slim desk
- Comfortable chair
- Laptop or monitor
- Small lamp
- Floating shelf
- Minimal accessories
This works particularly well when the window provides useful daylight.
The key is to use the natural light without forcing the screen into a reflective position.
Layout 2: The Hidden Closet Office
Convert an underused closet into a compact workstation.
Possible arrangement:
Upper shelves → Work supplies
Middle area → Screen or laptop
Lower area → Keyboard and work surface
Floor → Chair
When the working day ends, the doors can potentially close.
This arrangement is especially useful when maintaining a visual boundary between work and rest is important.
Layout 3: The Living-Zone Workspace
Place a narrow desk against a living-room wall or behind the sofa.
Use furniture that visually matches the surrounding room.
For example:
Sofa → Small gap → Desk → Wall
This allows the office to become part of the living arrangement.
It can be a useful solution when the studio has no spare closet or bedroom corner.
For more ideas on creating a balanced living area, explore our Living Space Inspirations in a Studio Apartment guide, which looks at ways to arrange compact living zones without making the space feel overcrowded.
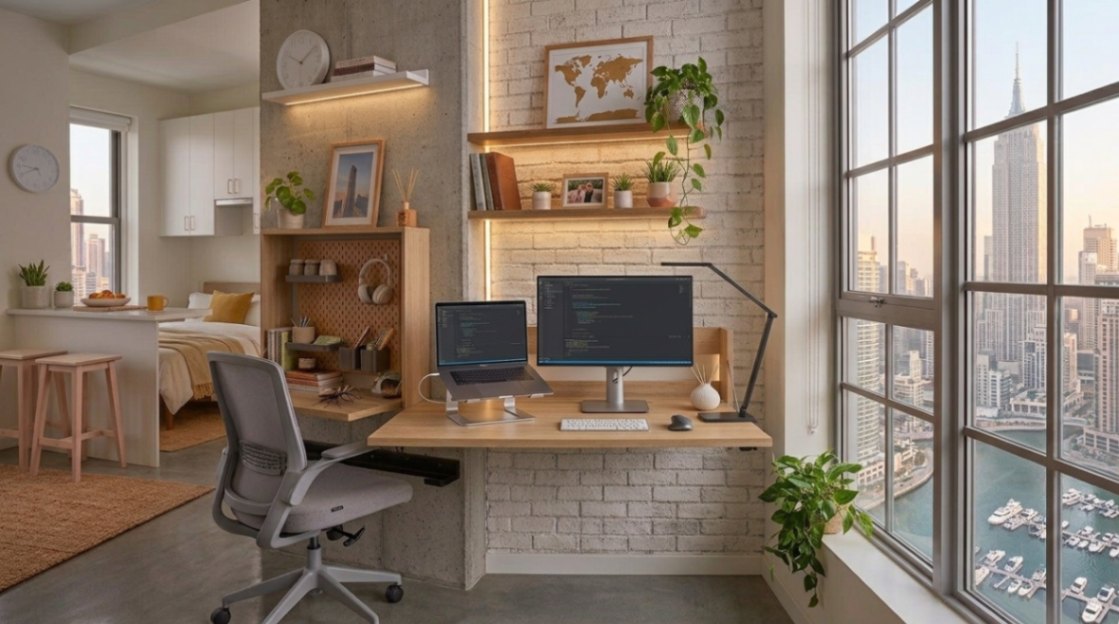
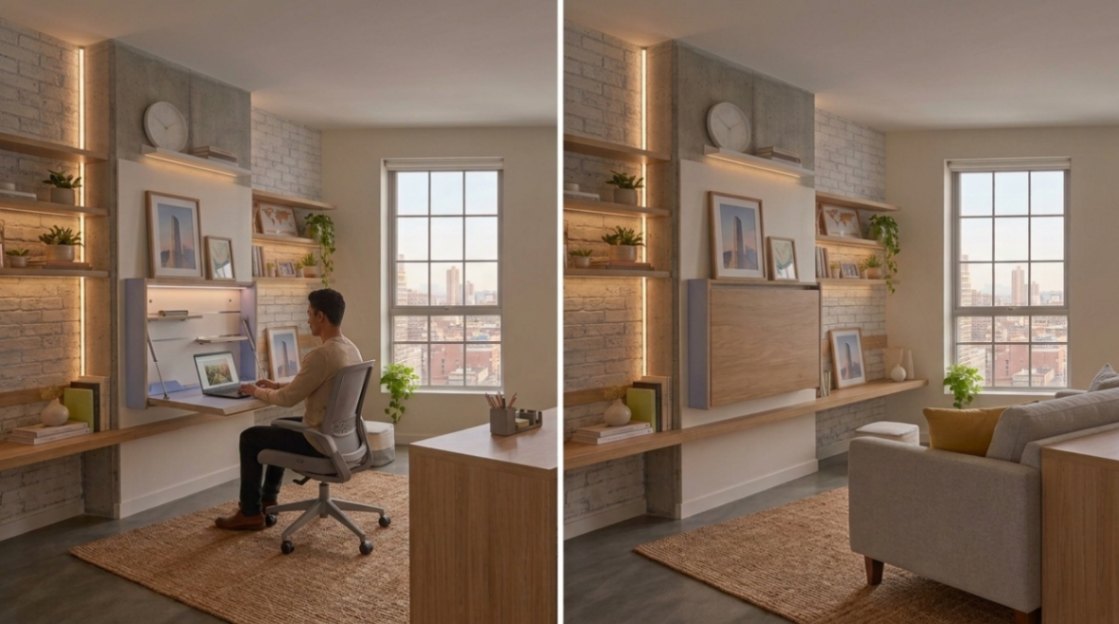
Layout 4: The Fold-Away Workspace
Use a wall-mounted or fold-down desk.
During working hours:
Desk open → Laptop → Chair → Work
After work:
Desk closed → Clear wall → Home
This is one of the clearest examples of making one part of a studio apartment serve different functions at different times.
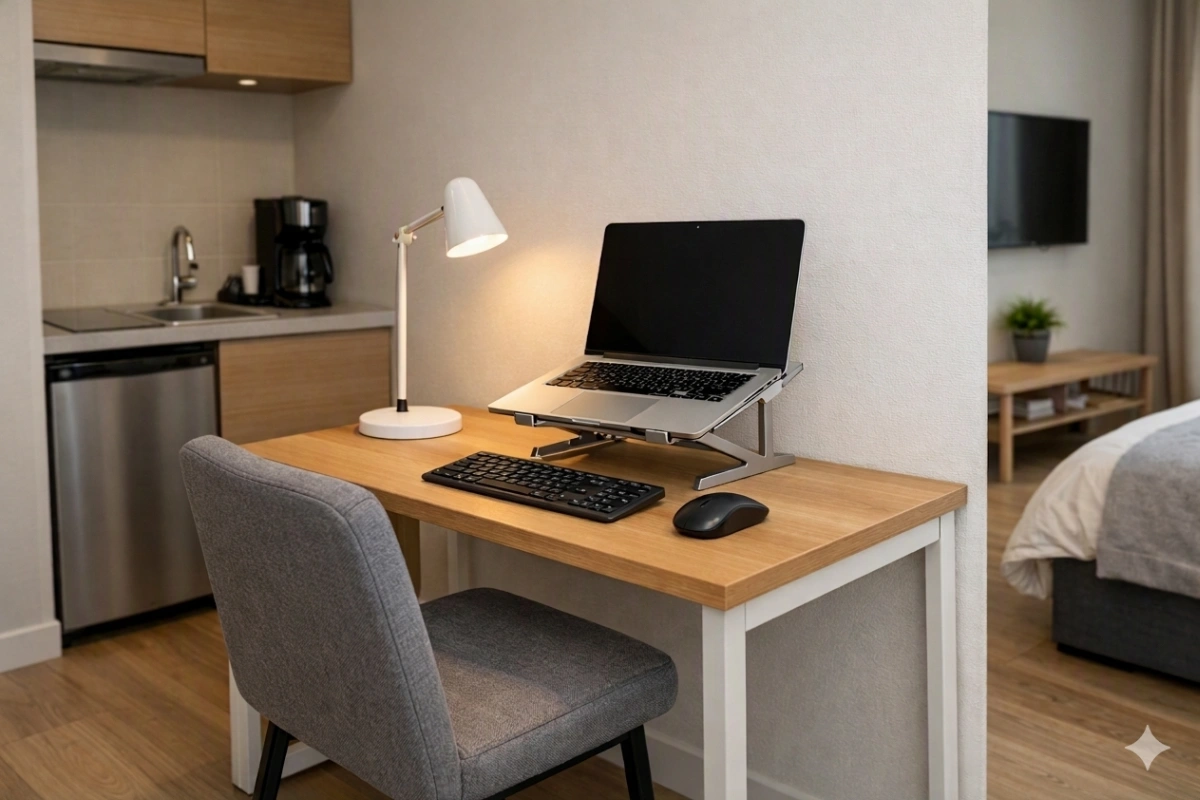
Layout 5: The Minimal Laptop Workspace
For someone who mainly works from a laptop, the setup can remain extremely simple.
Think:
Small desk + comfortable chair + laptop stand + keyboard + mouse + lamp
Add only what you actually use.
This approach can be particularly effective when every square foot matters.
Layout 6: The Bedroom-Side Workspace
If the sleeping area is the only available location, create visual separation.
Use:
- A narrow desk
- Open shelving
- A curtain
- A small screen
- A change in rug
- Furniture orientation
The goal is to make the work zone feel separate without constructing a permanent wall.
Common Studio Apartment Home Office Mistakes
A workspace can look attractive and still fail in everyday use.
Watch for these mistakes.
Choosing The Desk Before Planning The Room
A desk should serve the room.
The room should not be forced to serve the desk.
Using An Oversized Office Chair
A large chair can consume valuable floor space.
Choose based on the amount of support you actually need and the available circulation space.
Working From The Sofa Every Day
A sofa may be convenient for short tasks, but it may not provide the support and posture variety needed for long periods of computer work.
Placing The Screen Directly Against A Bright Window
This can create glare and make the screen harder to see.
Consider the relationship between the window, monitor, and light sources before fixing the desk in place.
Filling Every Wall With Storage
Vertical storage is useful.
Too much storage can make a small apartment feel visually crowded.
Use only what supports the work.
Leaving Work Equipment Everywhere
A studio apartment can quickly become a permanent office if the laptop, documents, cables, and accessories remain scattered around the room.
Create a shutdown routine.
Buying Furniture Because It Looks Good In A Photograph
A beautiful workspace online may not fit your room, work style, equipment, or daily routine.
Always ask:
Will this solve my actual problem?
How To Test Your Workspace Before Buying More Furniture
You do not have to buy everything at once.
In fact, testing the layout first can save money and frustration.
Use Temporary Objects
You can use:
- Books
- Boxes
- Tape
- Existing furniture
- Cardboard
A temporary table
Then sit in the proposed chair position and test the setup as if you were working normally.
Questions:
- Can I move comfortably?
- Does the chair have enough space?
- Does the screen face a strong light source?
- Can I reach what I need?
- Does the desk interfere with the bed?
- Does it block storage?
- Does it narrow the walking path?
- Can I imagine using this every day?
If the answer is no, change the layout before spending money.
A Simple Studio Apartment Home Office Planning Method
If you want a straightforward process, use this sequence.
1. Identify Everything Your Studio Must Do
List your essential activities.
2. Identify What Your Work Requires
List your equipment, storage, lighting, and workspace needs.
3. Map The Existing Room
Mark furniture, doors, windows, circulation paths, and storage.
4. Identify Possible Work Zones
Find two or three realistic locations.
5. Choose The Appropriate Level Of Separation
Decide between open, partially separated, or hidden.
6. Select The Desk Type
Choose the smallest desk that properly supports your work.
7. Plan The Chair
Allow enough room to sit, move, and get up comfortably.
8. Position Your Screen
Consider height, viewing position, and window glare.
9. Plan Lighting
Use natural light where practical and add task lighting when needed.
10. Add Vertical Storage
Move supplies upward instead of consuming more floor area.
11. Control Cables
Give every charger and cable a planned location.
12. Create A Shutdown Routine
Decide what happens when work ends.
13. Test The Layout
Live with the arrangement before buying additional furniture.
14. Reassess
After using the workspace for several days, identify what is actually working and what is not.
The Small Studio Apartment Home Office Checklist
Before considering your workspace finished, check each item.
Space
- The desk fits without blocking circulation.
- The chair has enough room to move.
- The workspace does not interfere with the bed.
- Doors, drawers, and storage remain accessible.
- The main walking path remains clear.
Work Setup
- The desk supports the equipment you actually use.
- The monitor is positioned appropriately.
- Keyboard and mouse are within comfortable reach.
- Frequently used items are easy to access.
- Laptop users have considered an external keyboard and mouse if needed.
Lighting
- The screen is protected from unnecessary glare.
- Natural light is useful rather than distracting.
- Task lighting is available when needed.
- The workspace is not significantly darker than the surrounding room.
Storage
- Work materials have designated homes.
- Vertical space is being used where appropriate.
- The desk is not being used as permanent storage.
- Cables are controlled.
- Small accessories are organized.
Home-Life Separation
- You know what happens when work ends.
- The workspace can be visually cleared or minimized.
- Work materials can be stored.
- The workspace does not dominate the room.
- The studio can return to its home function.
How To Make A Studio Apartment Home Office Feel Bigger
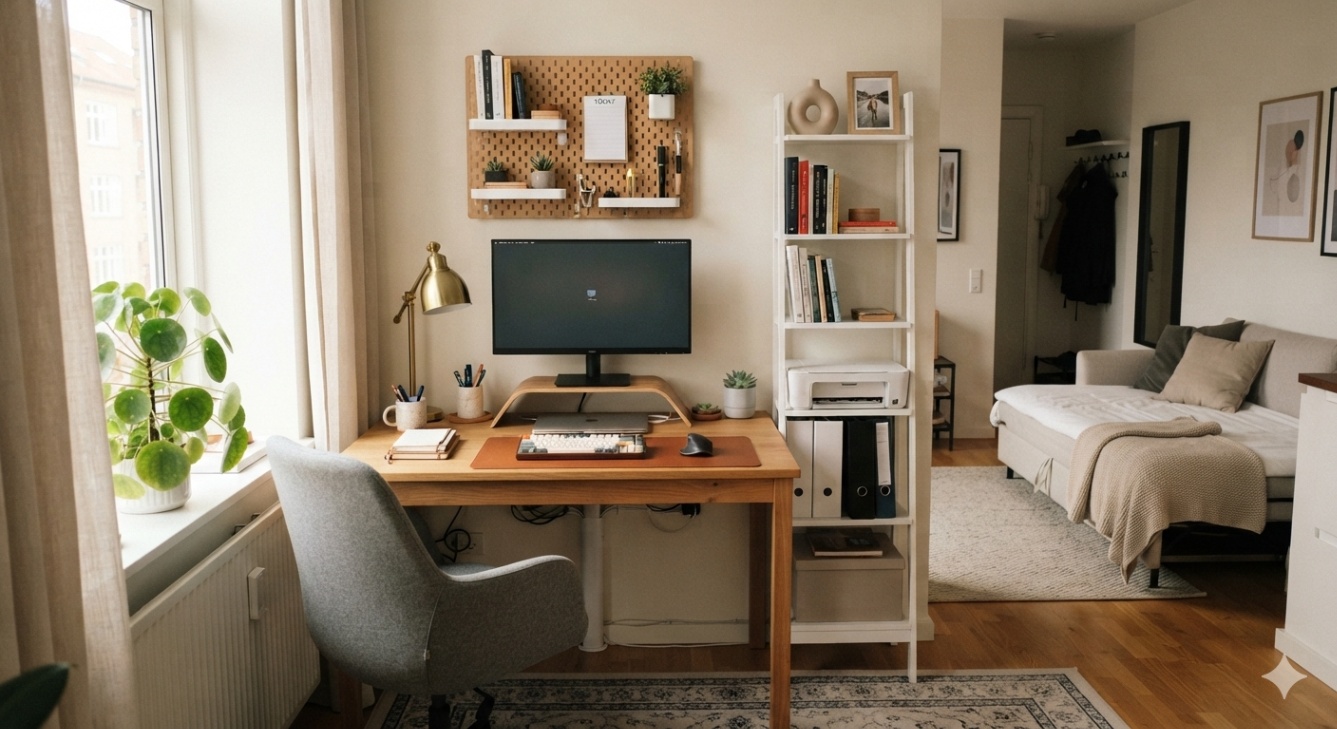
A small office does not necessarily need more space. Sometimes it needs less visual weight.
Keep The Floor Visible
Furniture with open space underneath can make the room feel lighter.
Use The Walls
Shelves and wall-mounted storage can reduce the need for additional floor cabinets.
Match The Workspace To The Room
A desk that visually complements the surrounding furniture can feel more integrated.
Reduce Unnecessary Equipment
Only keep equipment that serves a real purpose.
Use One Strong Visual Feature
A plant, artwork, lamp, or carefully selected wall detail can provide personality without filling the room.
Keep The Main Surface Clear
A clear desk can make the entire room feel more organized.
What Makes a Studio Apartment Home Office Successful?
A successful studio apartment home office is not necessarily the largest, most expensive, or most decorated workspace.
It is the workspace that fits the life of the person using it.
It should allow you to work comfortably while respecting the rest of the studio. It should provide enough storage without consuming unnecessary floor space, use lighting intelligently, and keep equipment organized.
Most importantly, it should allow the room to stop feeling like an office when the working day is over.
A well-planned workspace does not need to dominate the apartment. Instead, it should work naturally with the bedroom, living area, storage, and other functions already present in the studio.
That is why the best studio apartment home office ideas begin with zoning and daily habits, not shopping.
Final Thoughts: Your Studio Can Be Both Home and Workplace
Creating a home office in a studio apartment is really an exercise in making one room perform several different jobs.
You do not need a separate office to create a meaningful workspace.
You need to understand what the room already provides, identify an underused area, choose furniture that respects the available space, arrange your equipment carefully, and create boundaries between work and rest.
Sometimes the answer will be a small desk near a window.
Sometimes it will be a workspace behind the sofa.
Sometimes it will be a closet office.
Sometimes it will be a fold-down desk that disappears at the end of the day.
And sometimes the smartest solution is simply a very small workstation that does exactly what you need and nothing more.
The important thing is to design the relationship between the workspace and the rest of the studio.
Your home office does not have to compete with your home.
It can become one carefully planned part of it.
If you are looking for more ways to organize a compact studio around its everyday functions, explore the Inspiration Layouts collection for practical layout ideas and visual inspiration. When you are ready to consider the furniture and equipment that can support your workspace, visit the Product Index for a selection of compact-living products.
Researched, Written & Curated by Josiah Digital Hub.
Discover more from Josiah Digital Hub
Subscribe to get the latest posts sent to your email.